Mar 29, 2026|Zer0
AI Automation Workflow Tools: 10 Effortless Steps to Build a WordPress Site

In today’s fast-paced digital landscape, launching a website should not require weeks of manual coding or complex server configurations. For agencies, developers, and creators looking to scale, the focus has shifted toward streamlined, intelligent workflows. By combining robust server management with cutting-edge AI automation workflow tools, you can now build, deploy, and launch a professional web presence faster than ever before. If you are ready to eliminate technical bottlenecks and put your web development on autopilot, learning these 10 effortless steps to build a wordpress site using ai automation workflow tools is exactly what you need. Additionally, if you’re looking to explore more specialized tools beyond server management, platforms like Peraiz offer a curated space to discover and compare the best AI-driven solutions for your business.
What is xCloud?
xCloud is a server management and managed hosting platform that simplifies the process of deploying web applications. It serves as a centralized control panel, allowing you to connect cloud servers from providers like DigitalOcean, Vultr, or AWS without requiring advanced system administration skills. By automating routine DevOps tasks such as security configurations, SSL installations, and backups, xCloud provides a reliable and fast infrastructure for hosting WordPress sites, Laravel projects, or even complex open source AI automation tools. As the foundation for modern web deployment, it pairs perfectly with advanced AI automation workflow tools.
Deploy Your WordPress Website in Minutes
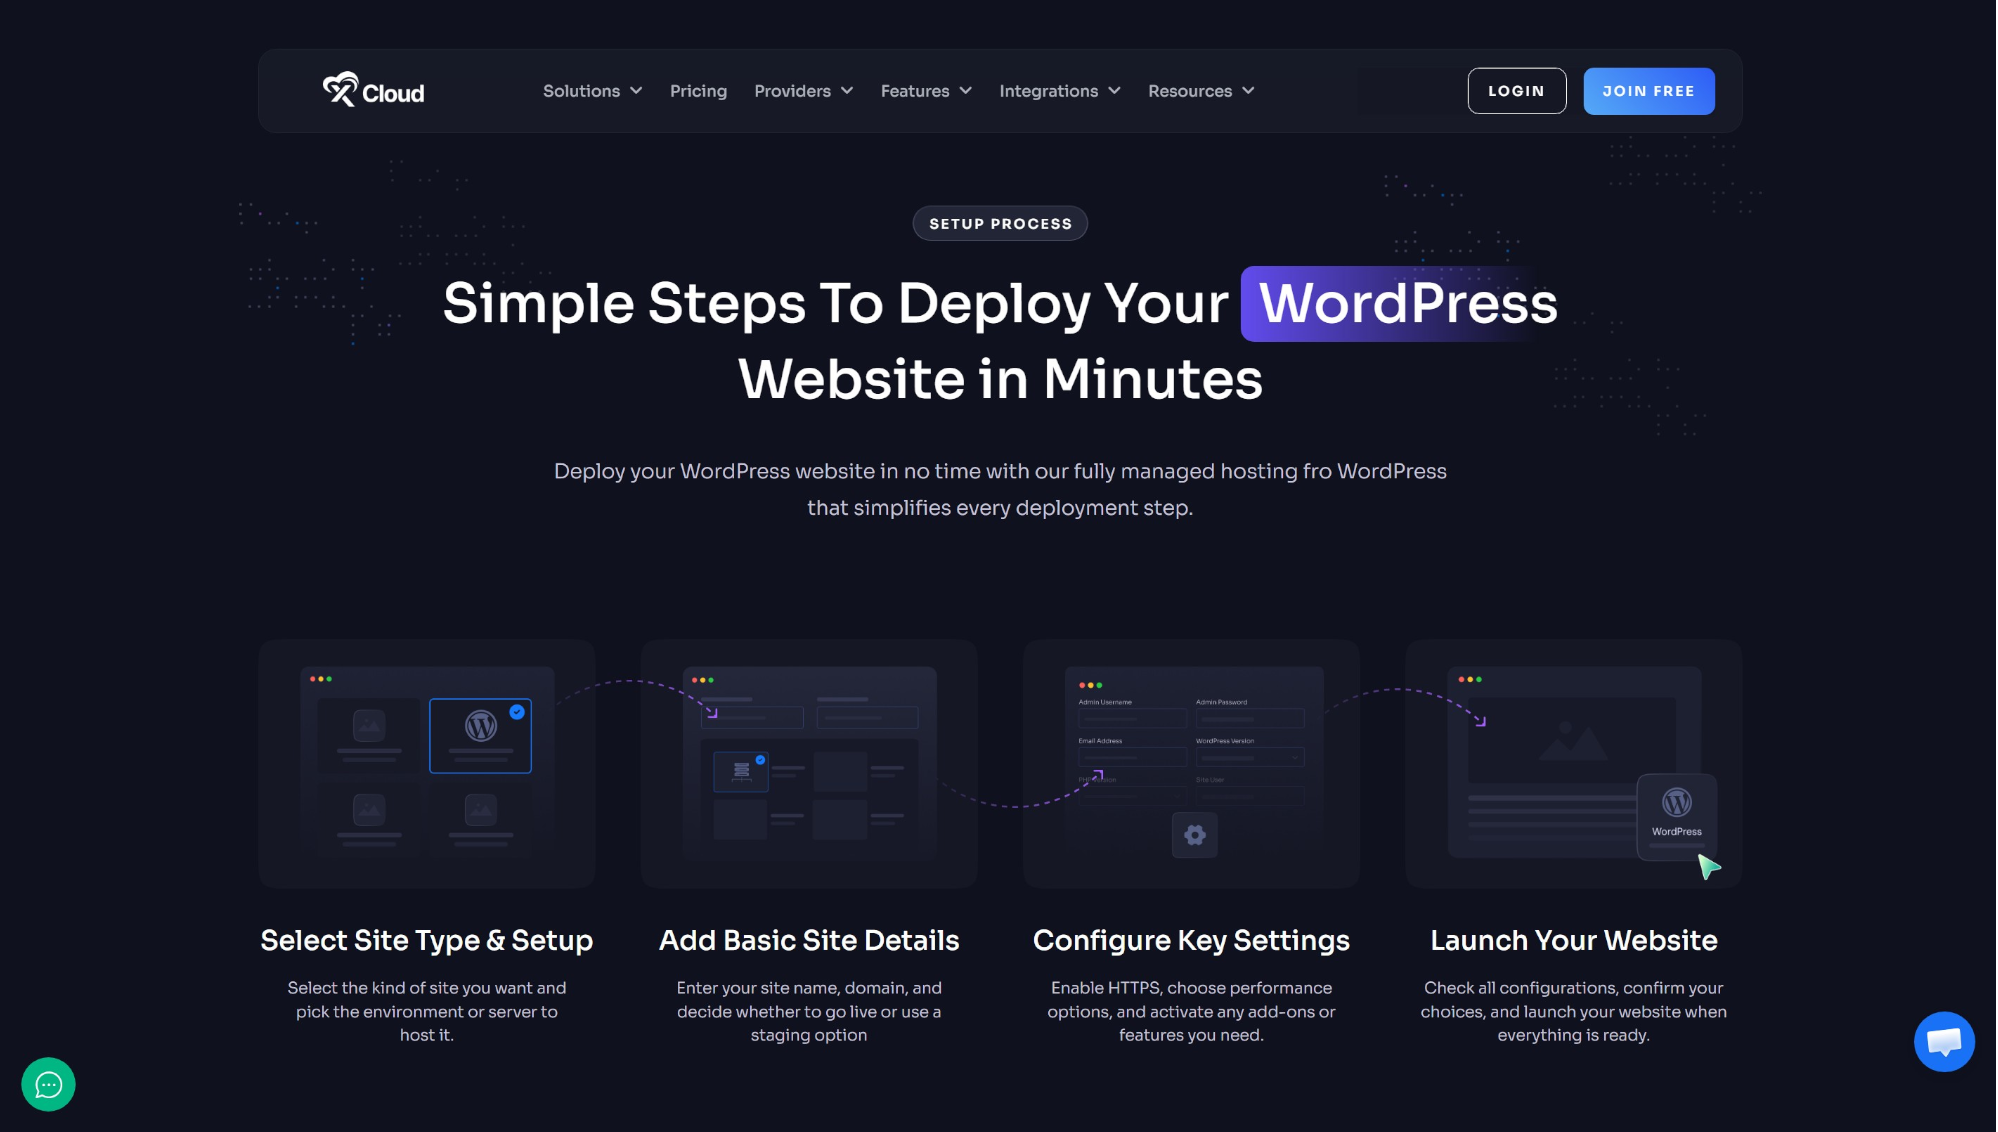
Creating a new WordPress website no longer requires hours of complex server configuration. Modern, fully managed hosting solutions have simplified the entire process, allowing you to deploy a fully functional website in a matter of minutes. By breaking down the setup into a few straightforward actions—such as selecting your environment, adding basic site details, and configuring key performance settings — you can launch your site smoothly and securely. But what if you could accelerate this workflow even further by integrating AI automation workflow tools to generate your site’s entire design and content automatically?
How to Build a WordPress Site Fast: Master xCloud & Templately AI
Building a new website from scratch doesn’t have to be a headache. When you have the right AI automation workflow tools and a clear process, launching a professional site is easier than ever. xCloud makes it incredibly simple to deploy a fully functional WordPress site using the power of Templately AI.
If you are wondering how to make AI automations work for your web design process, xCloud enables you to launch your website quickly and efficiently using ready-made templates and AI-generated content.
Follow these simple steps to create a stunning WordPress site right from your xCloud dashboard.
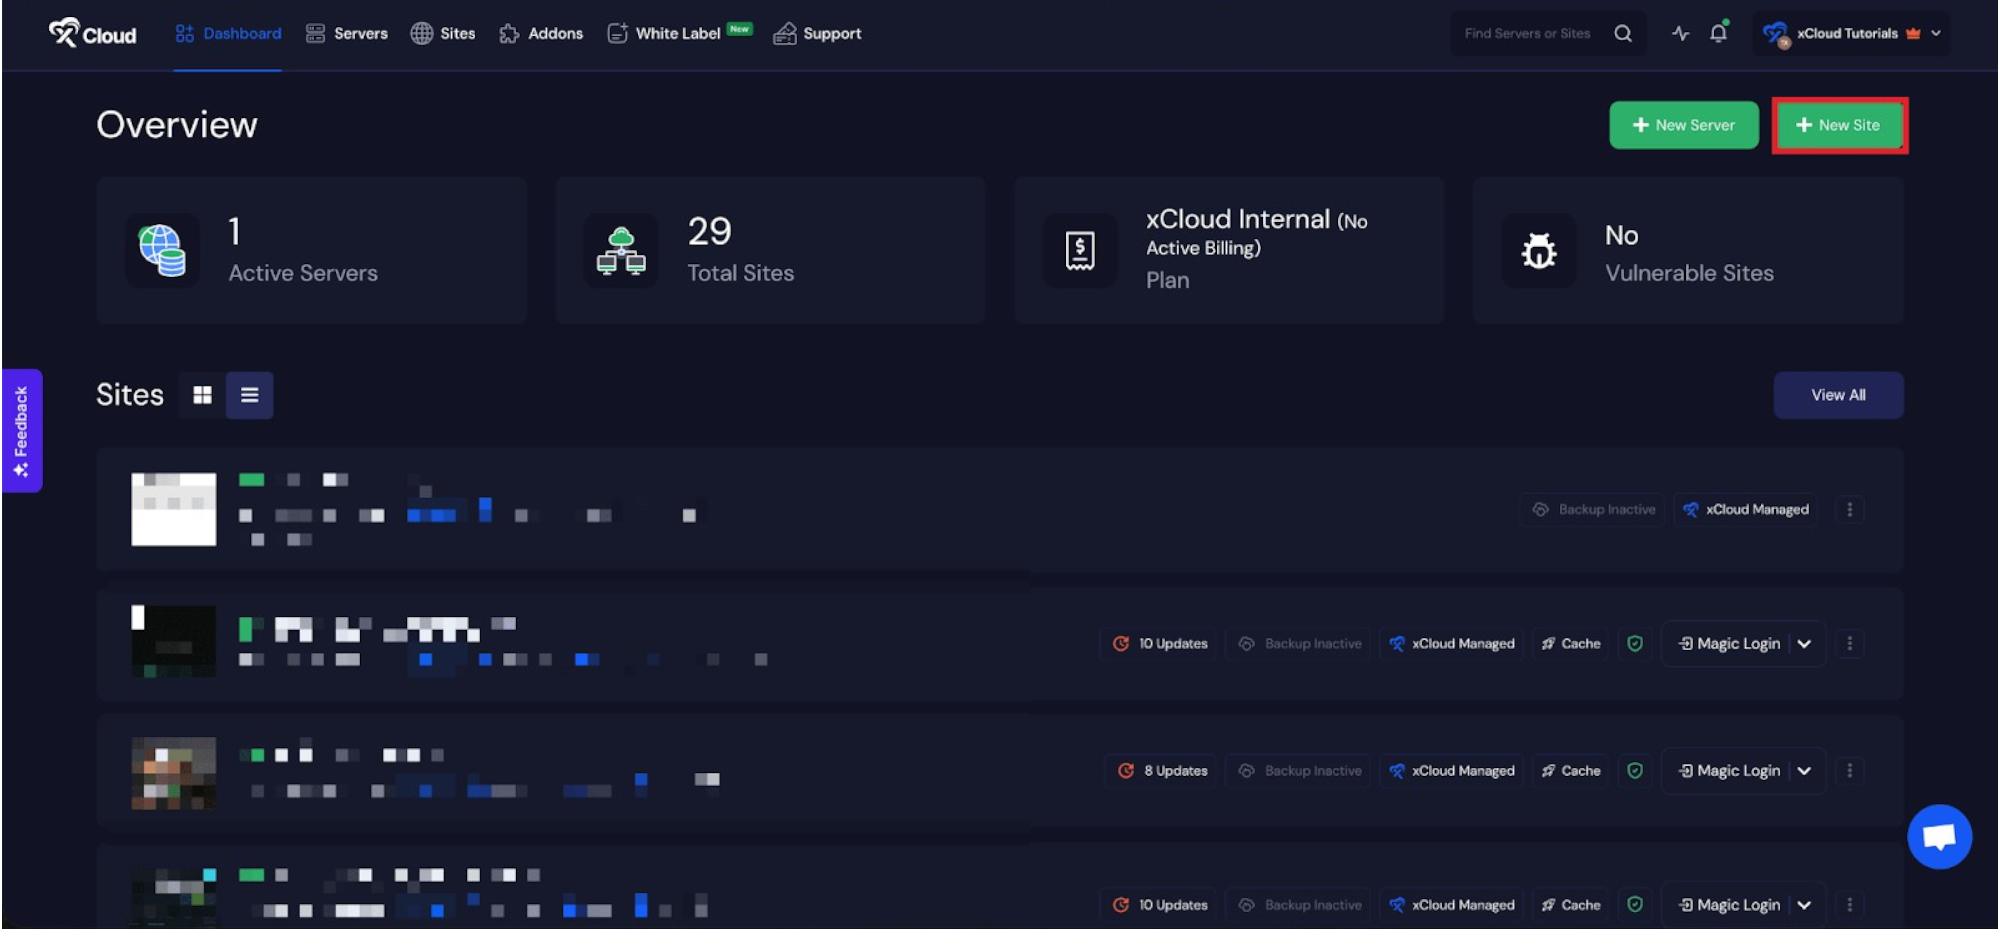
Step 1: Access Your xCloud Dashboard
Begin by logging into your xCloud account. Once logged in, navigate to your main dashboard and click on the ‘New Site’ button.
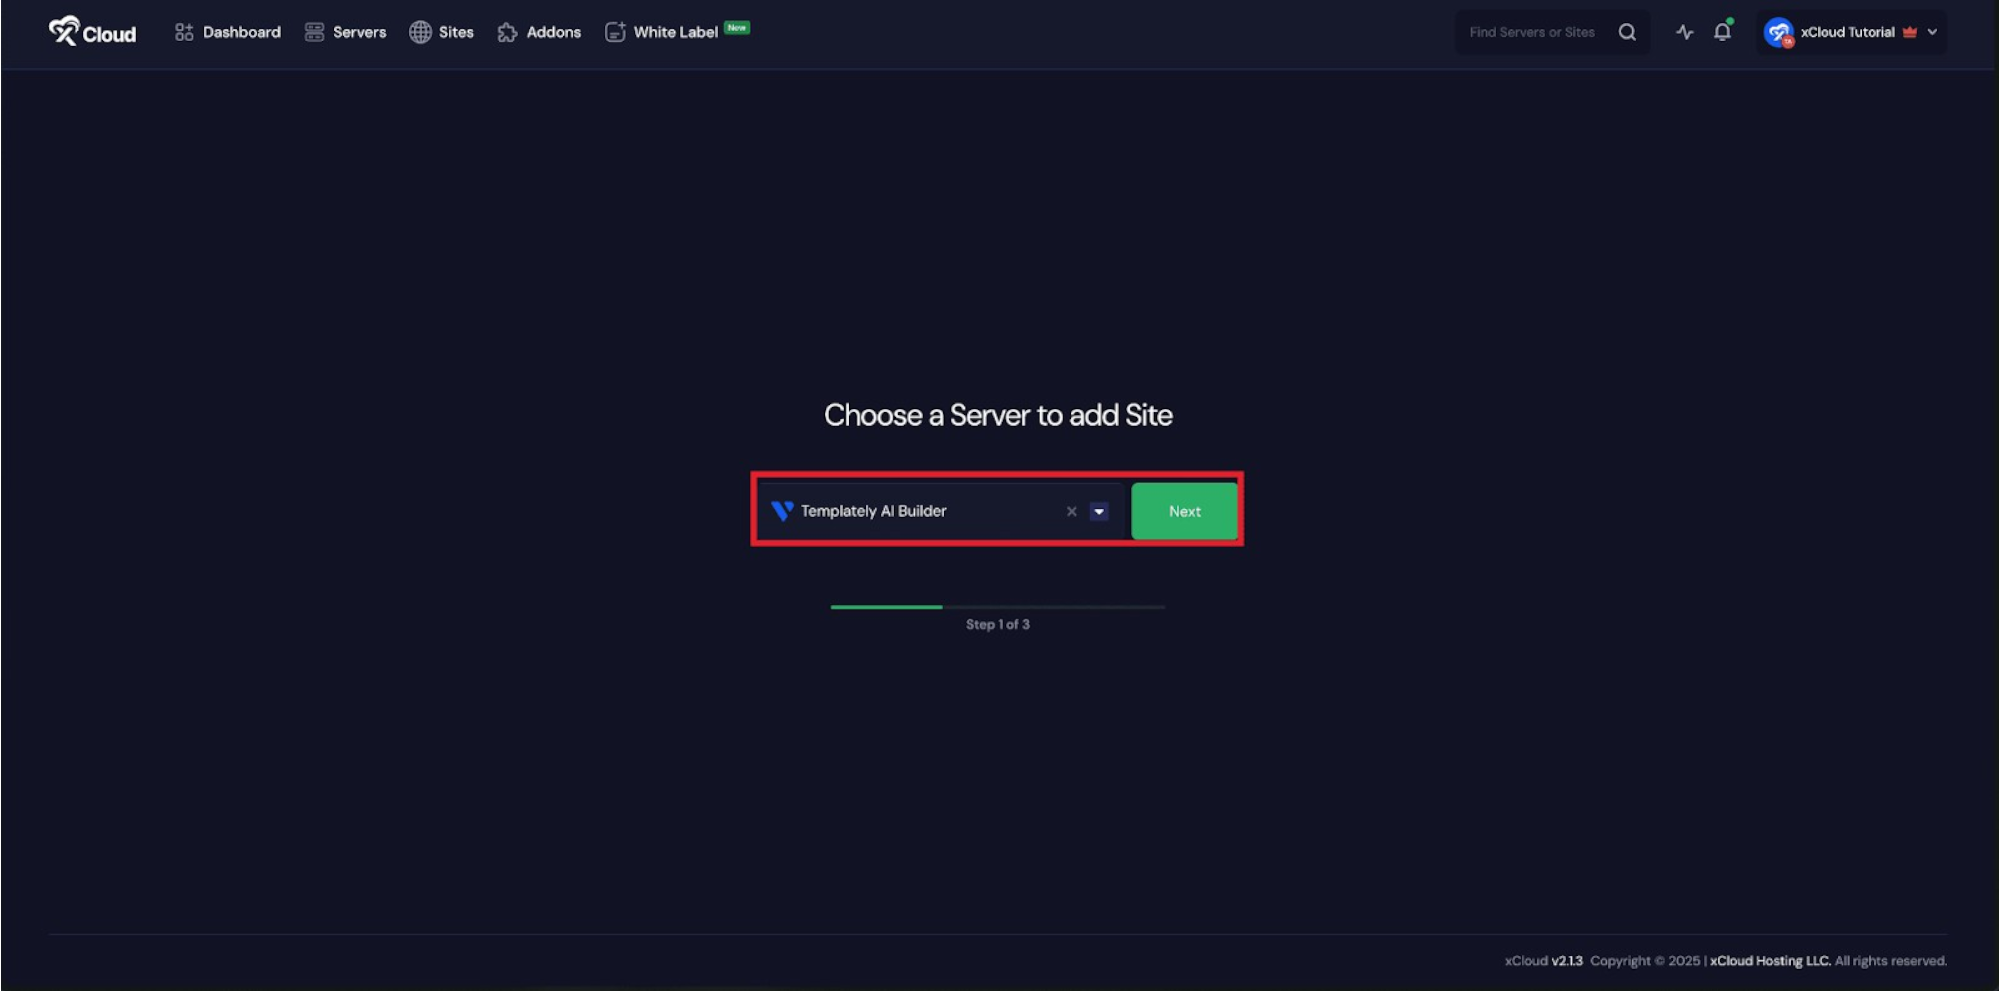
Step 2: Choose Your Server
Once your server is successfully connected, you can create a site directly from the dashboard or the Site List by clicking the ‘Create New Site’ button. Choose your preferred server from the dropdown menu, then click ‘Next’ to proceed.
Step 3: Choose Your Site & Add Information
Since we are creating a fresh WordPress installation, select the ‘Install New WordPress Website’ option.
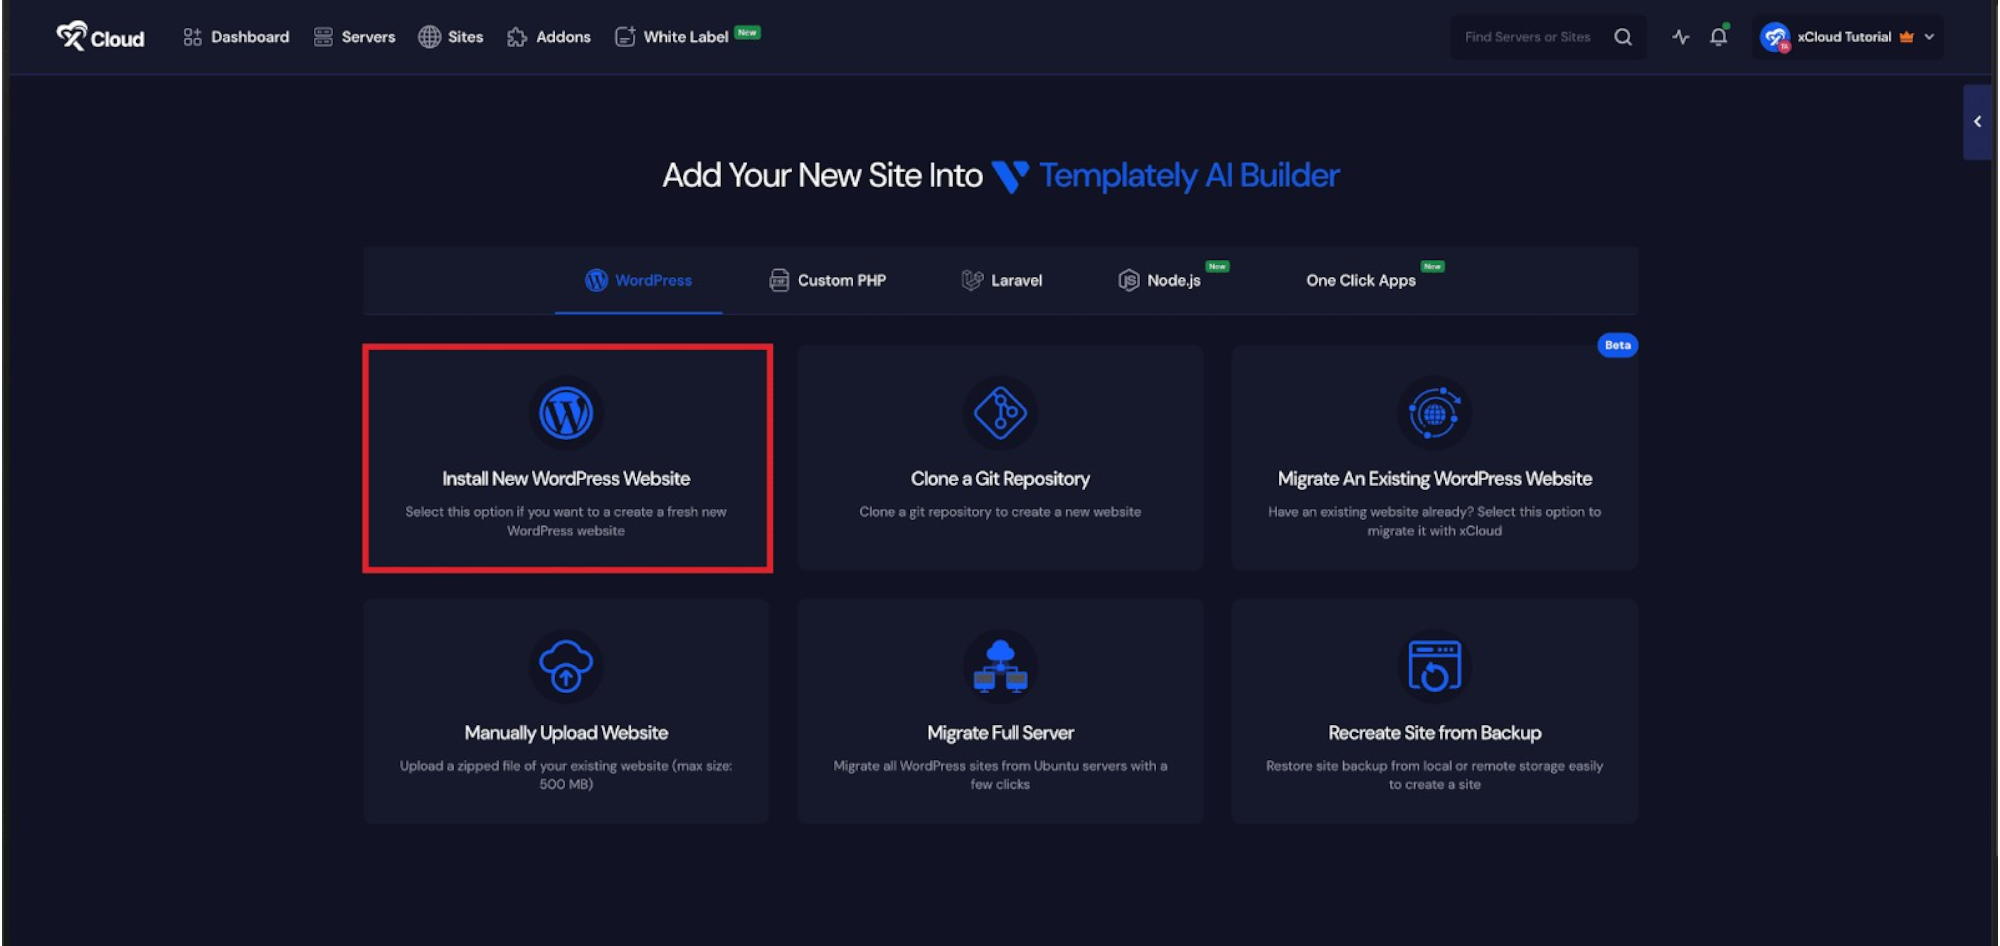
Step 4: Select Your Site Creation Method
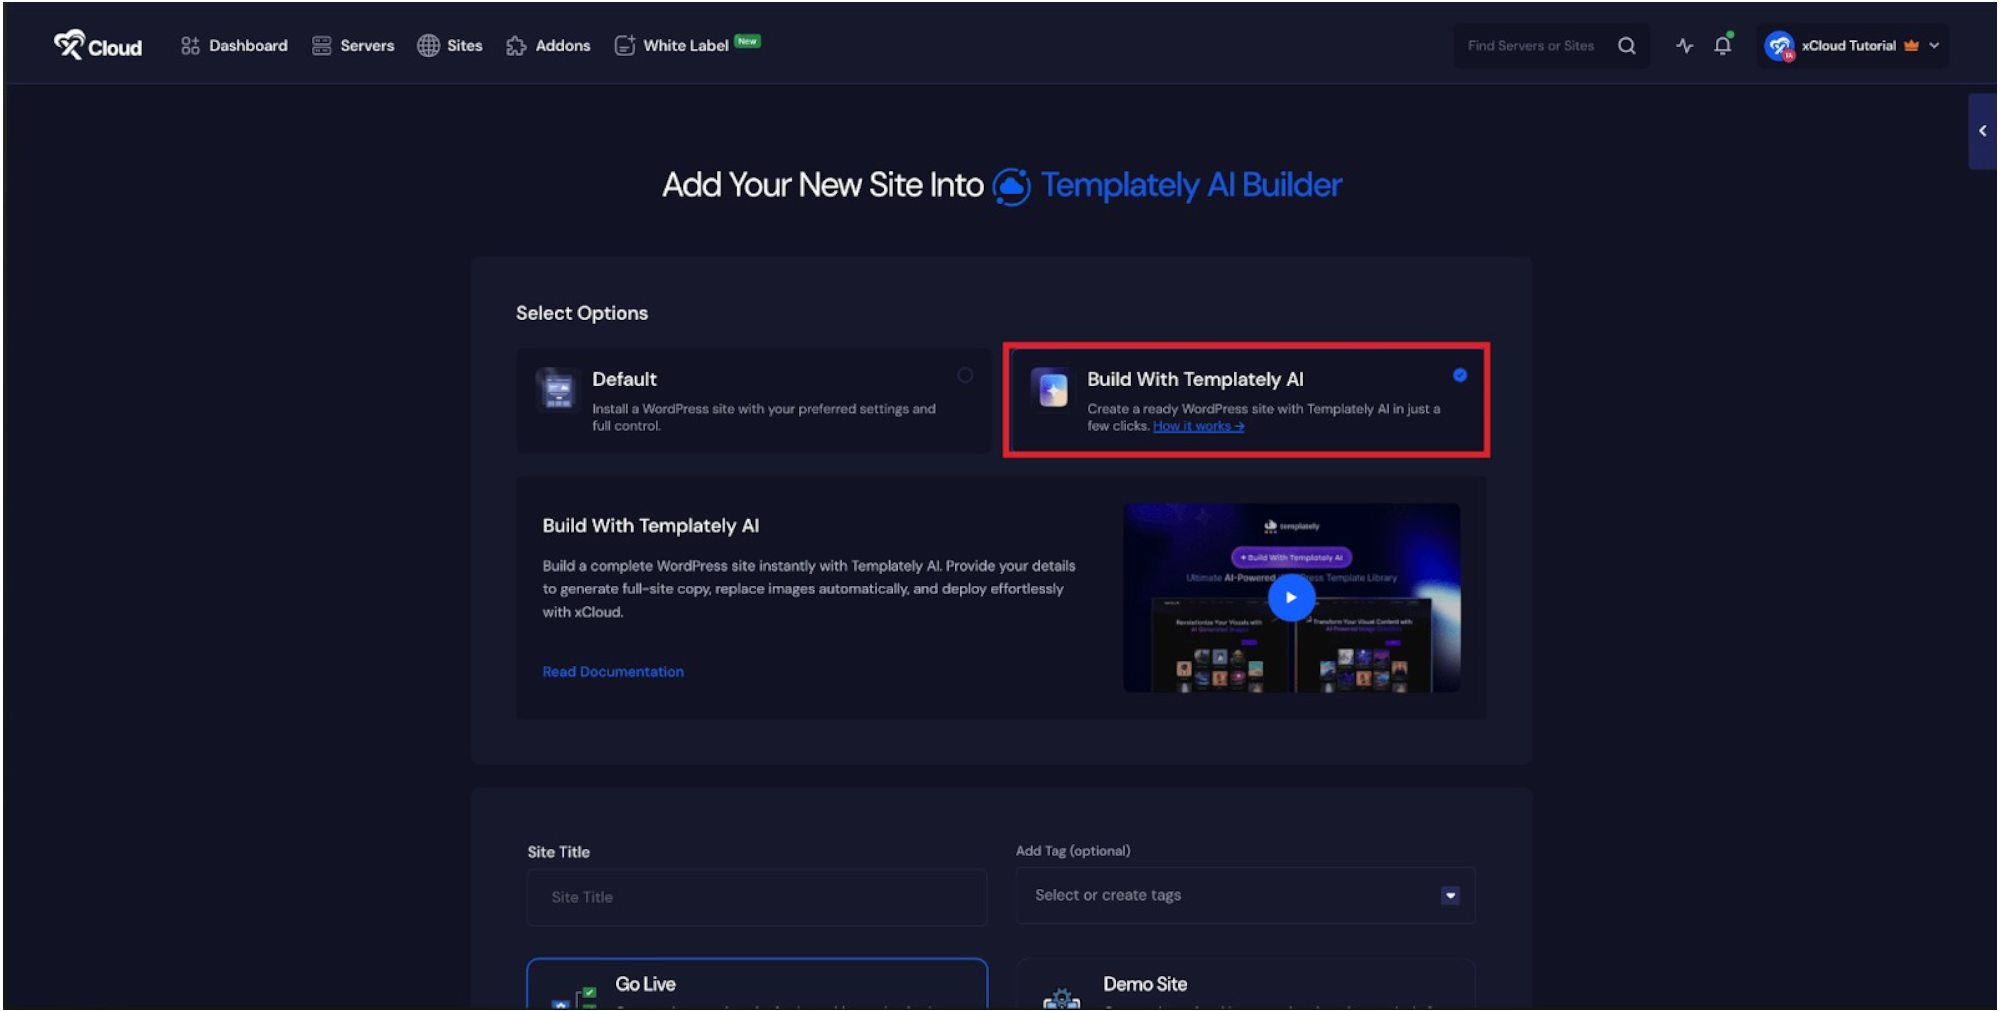
Next, you need to choose your deployment method: ‘Default’ or ‘Build With Templately AI’.
- To create a site manually, choose the ‘Default’ method.
- To leverage agentic ai automation tools for a faster build, choose ‘Build With Templately AI’.
Step 5: Set Up Your Site Details
In the site setup screen, you will be prompted to enter basic site information. Provide a ‘Site Title’ and add relevant ‘Tags’ to help organize your deployments efficiently.
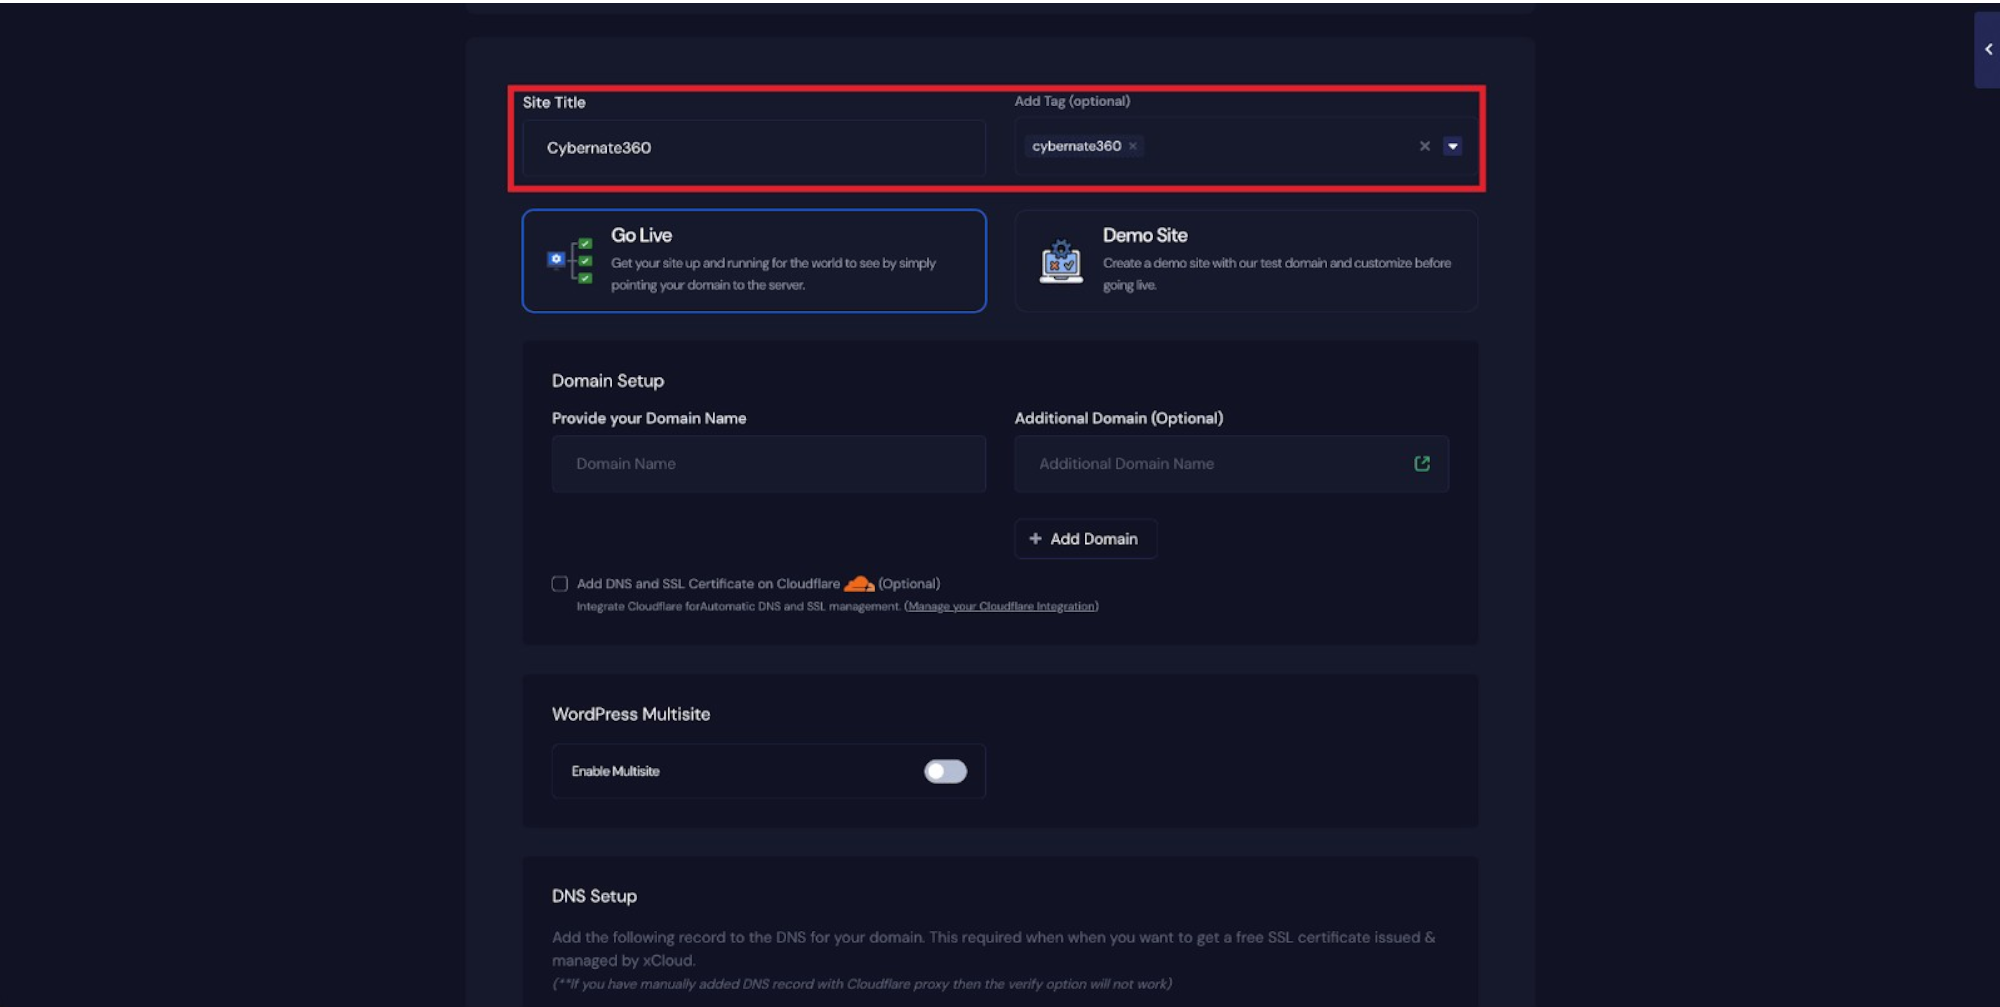
At this stage, you can choose between two deployment modes:
- Go Live: For a production-ready, public-facing deployment.
- Demo Site: For deploying the site instantly using a temporary demo domain provided by xCloud.
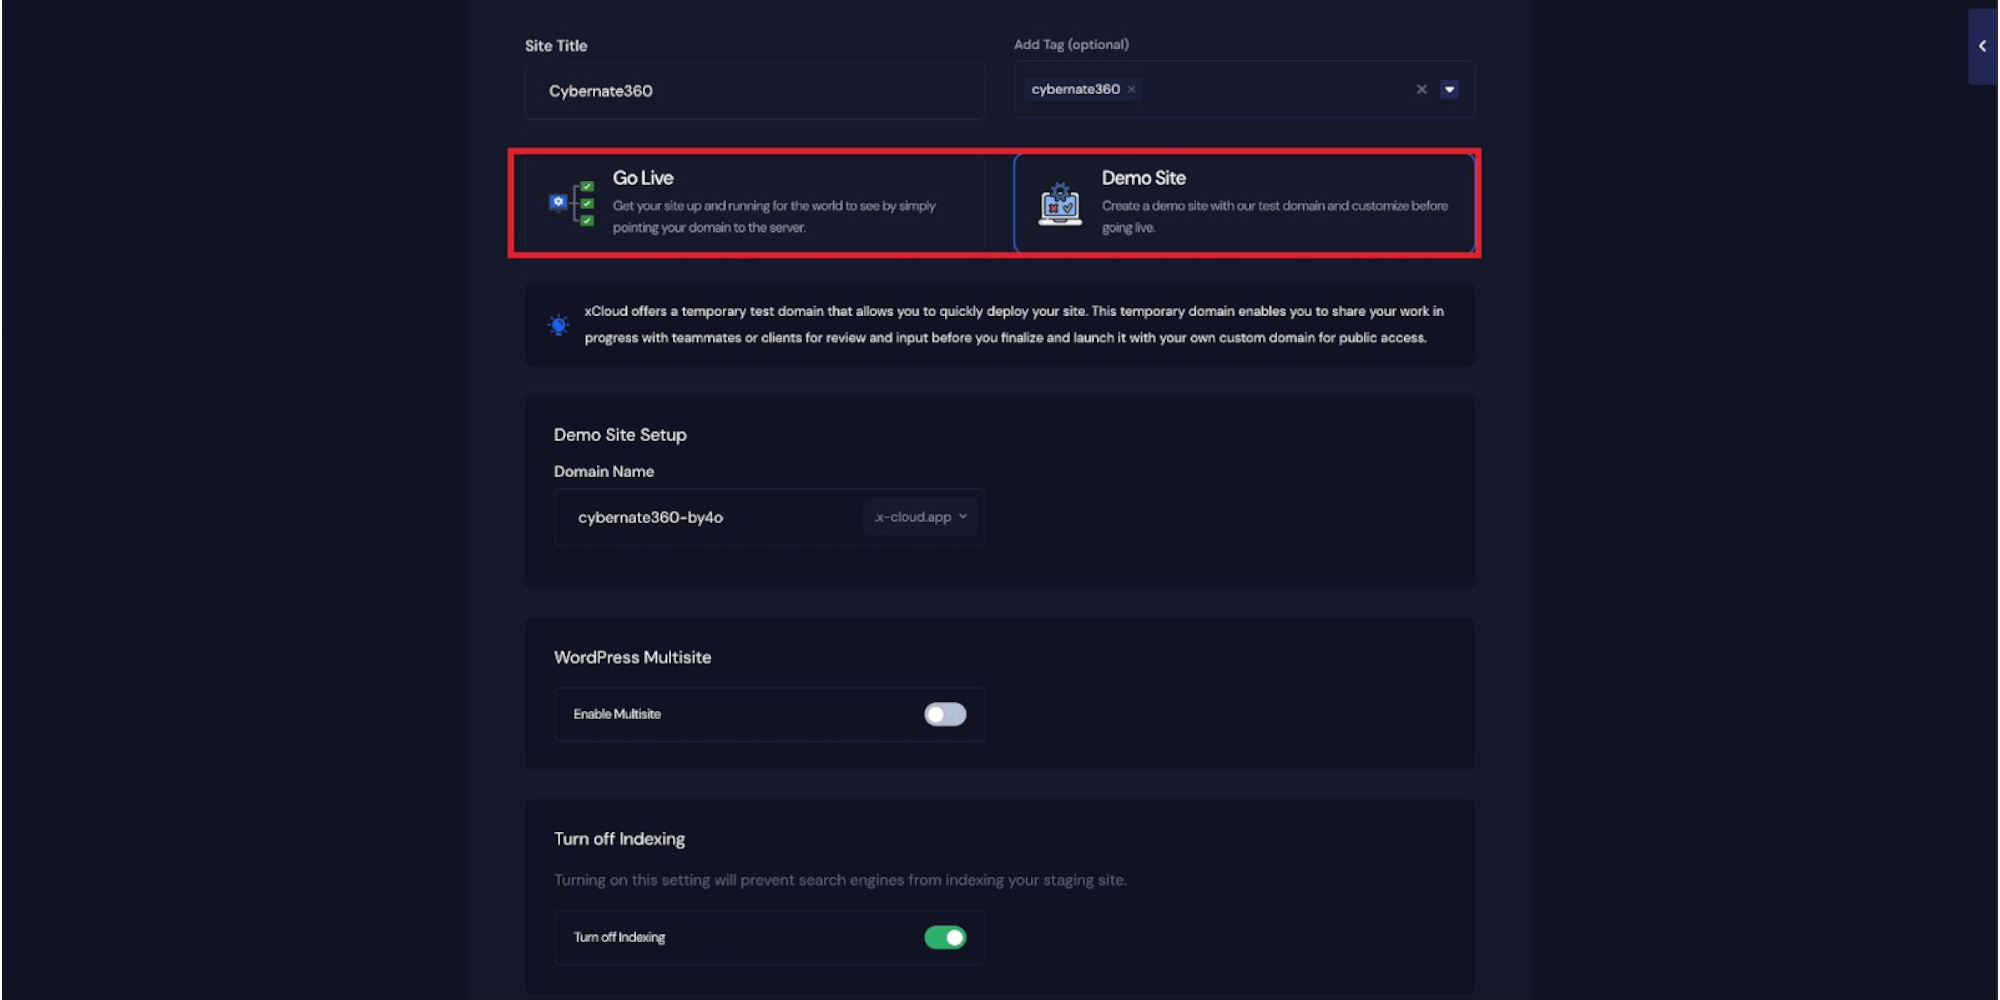
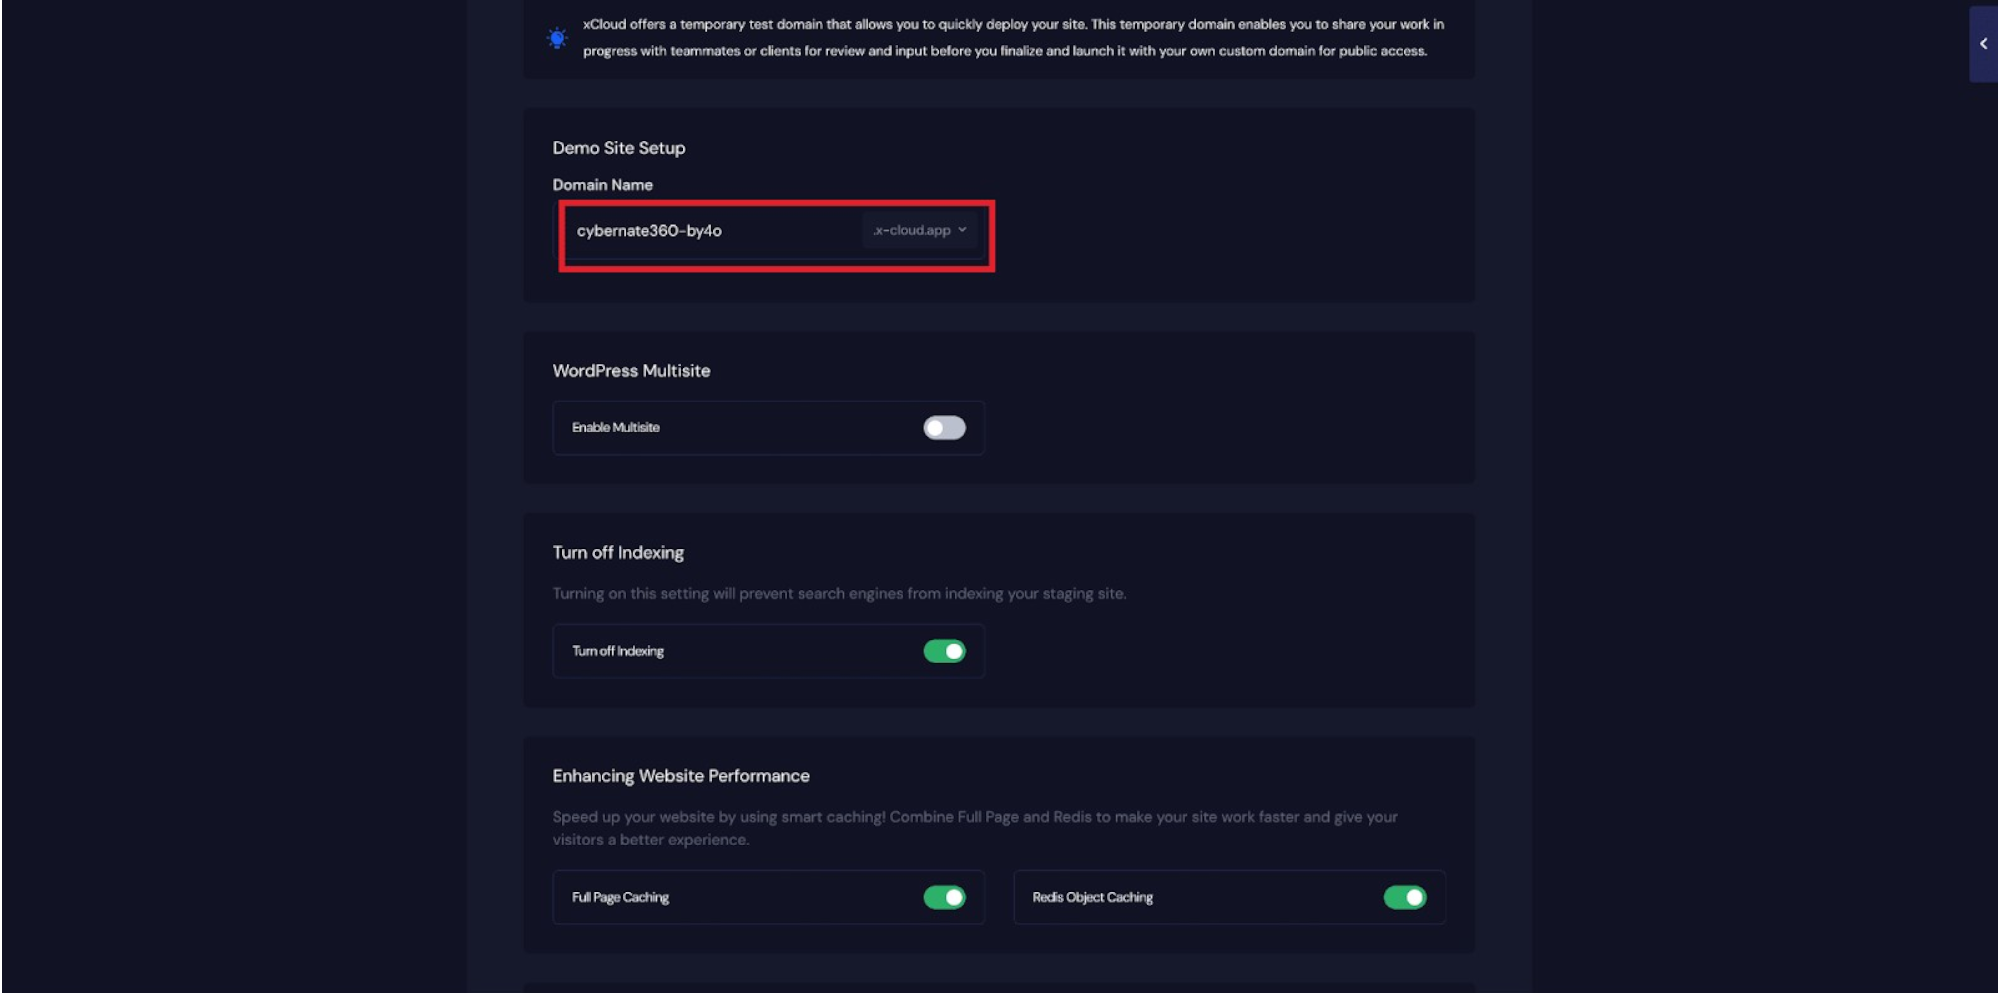
Step 6: Configure Domain Settings & Email
If you select the Demo Site option, xCloud will assign a temporary subdomain for your new WordPress application. Otherwise, enter your custom domain name.
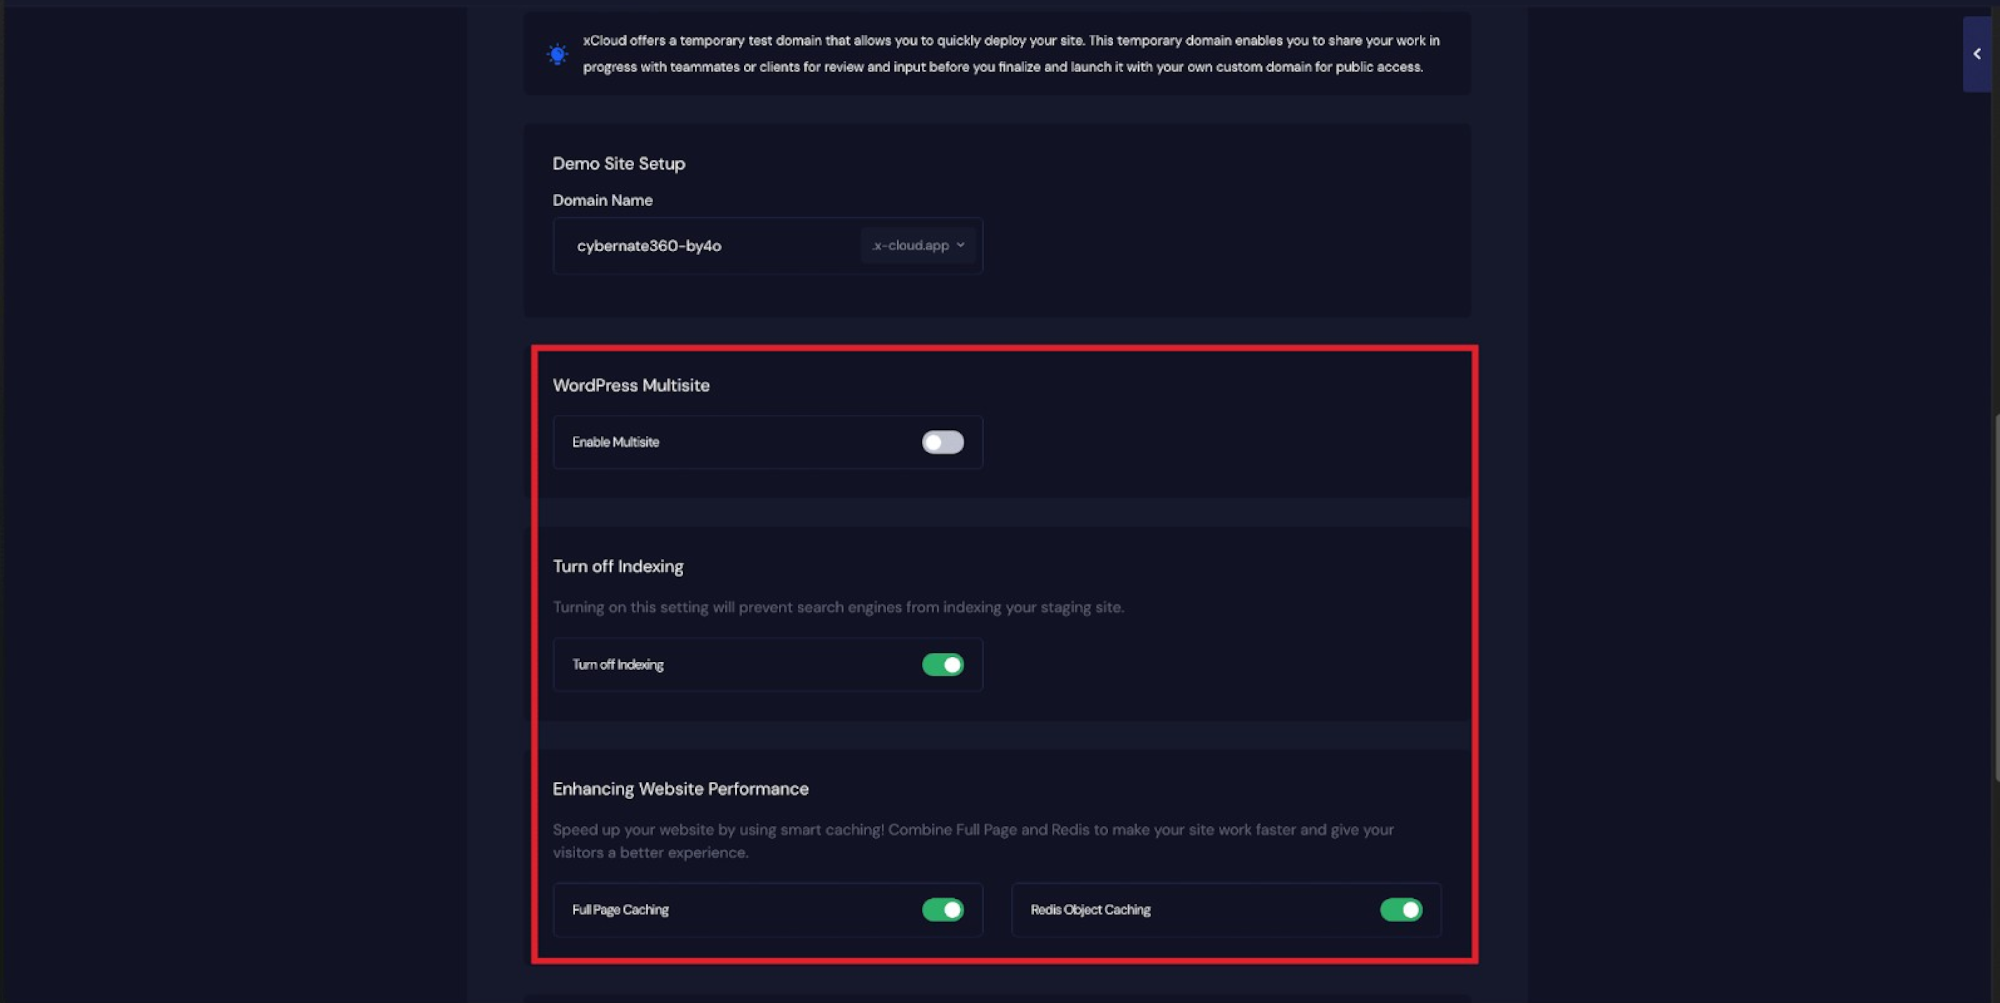
You will also see multiple configuration options to optimize your site, including ‘WordPress Multisite’, ‘Turn Off Indexing’, ‘Full Page Caching’, and ‘Redis Page Caching’. Toggle these on according to your performance preferences.
Note for WordPress Multisite Users: When using Multisite, xCloud will only build the Primary Site during deployment. Additional network sites will not be automatically generated and must be created manually within the WordPress Network Admin dashboard after deployment.
Get 100 Free Emails With xCloud Email Delivery
Next, toggle on the ‘Email Provider Configuration’ for your site. xCloud generously provides 100 free emails per site to help you get started.
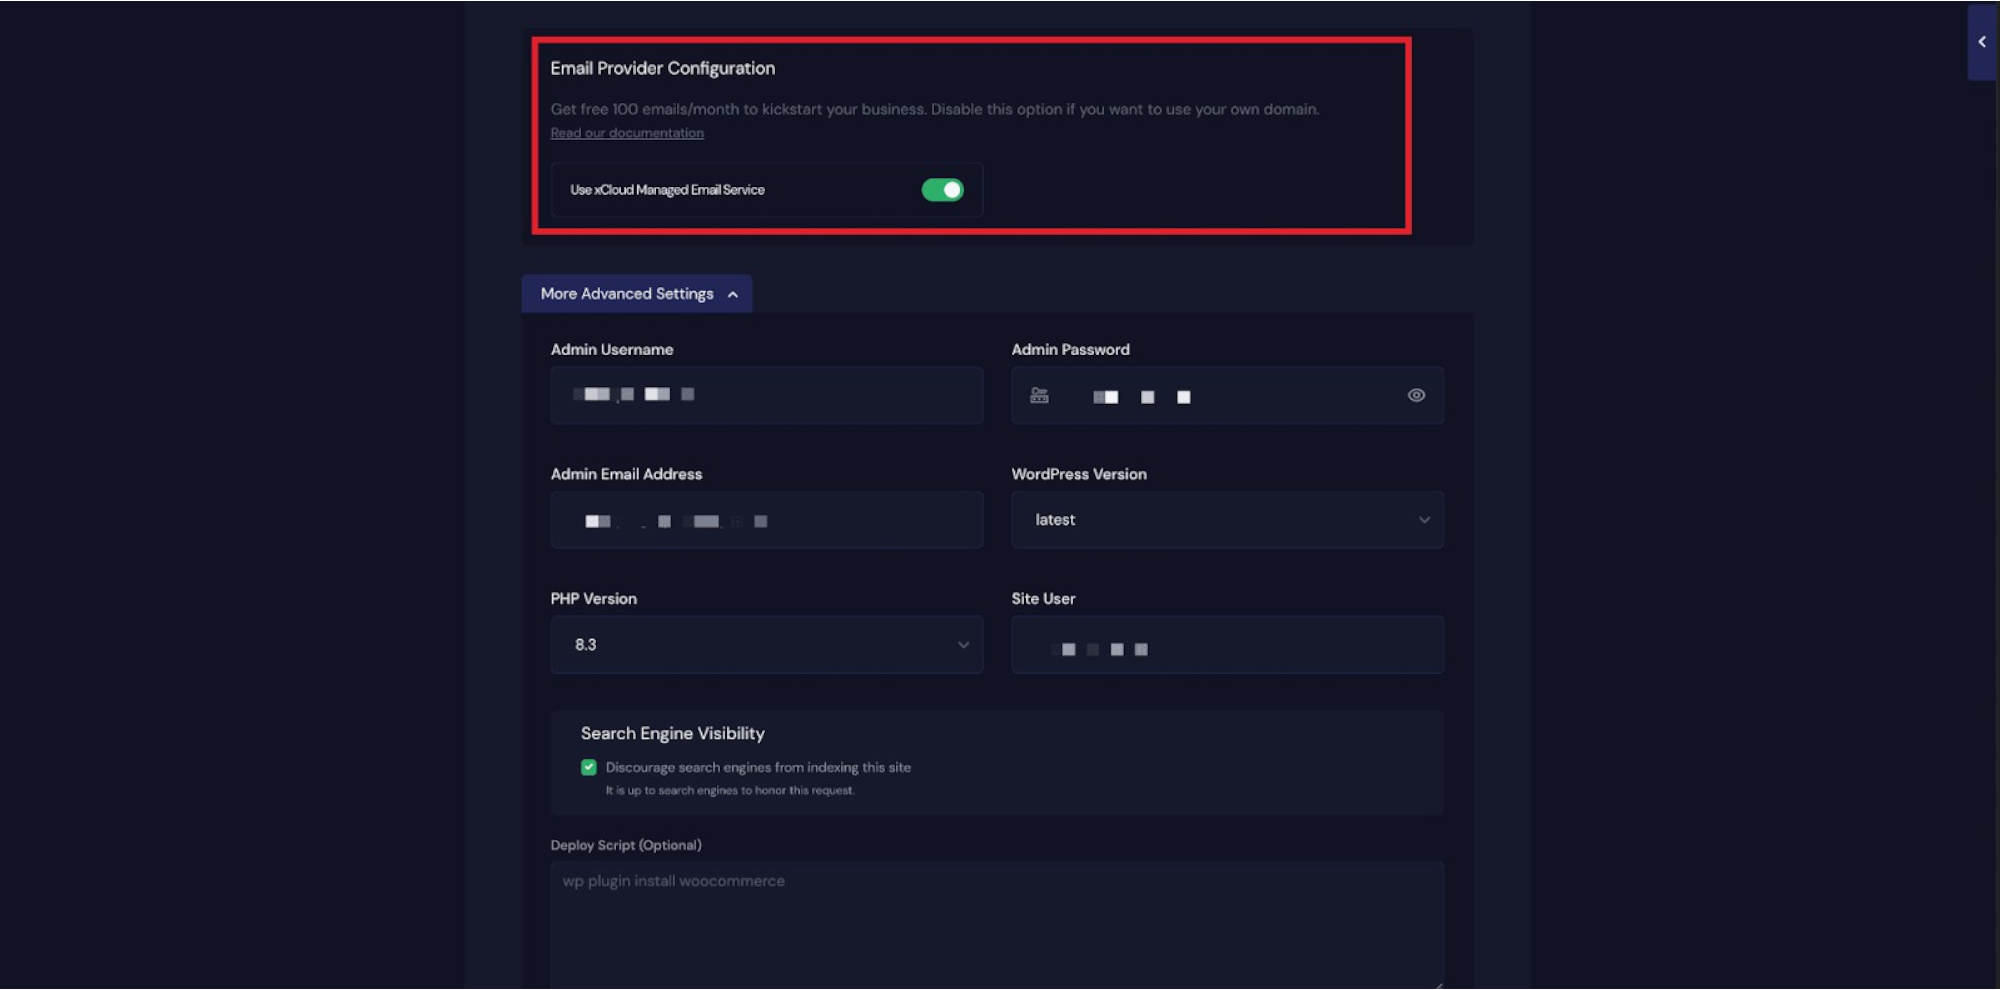
Step 7: Configure Advanced Settings
By default, your WordPress admin credentials are auto-generated to speed up the site creation process. Once your site is deployed, you will receive these credentials via email (you can always update your password later).
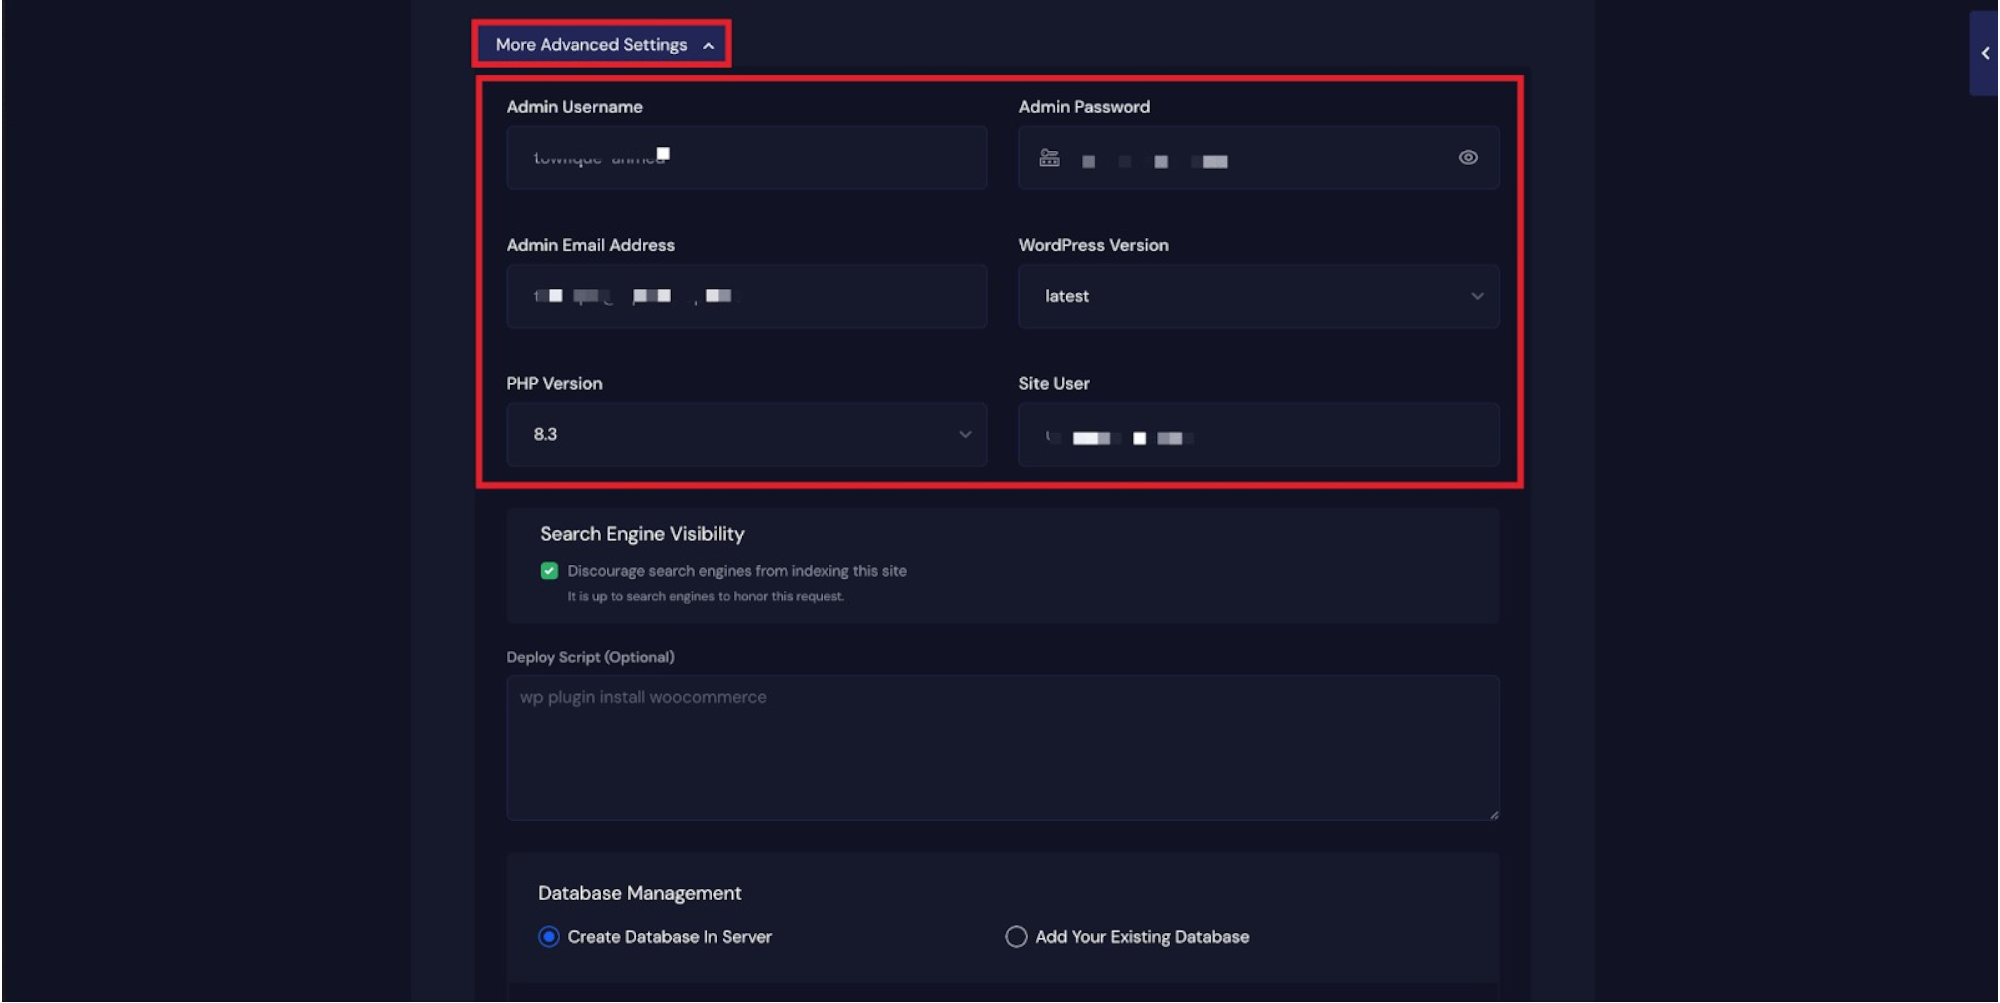
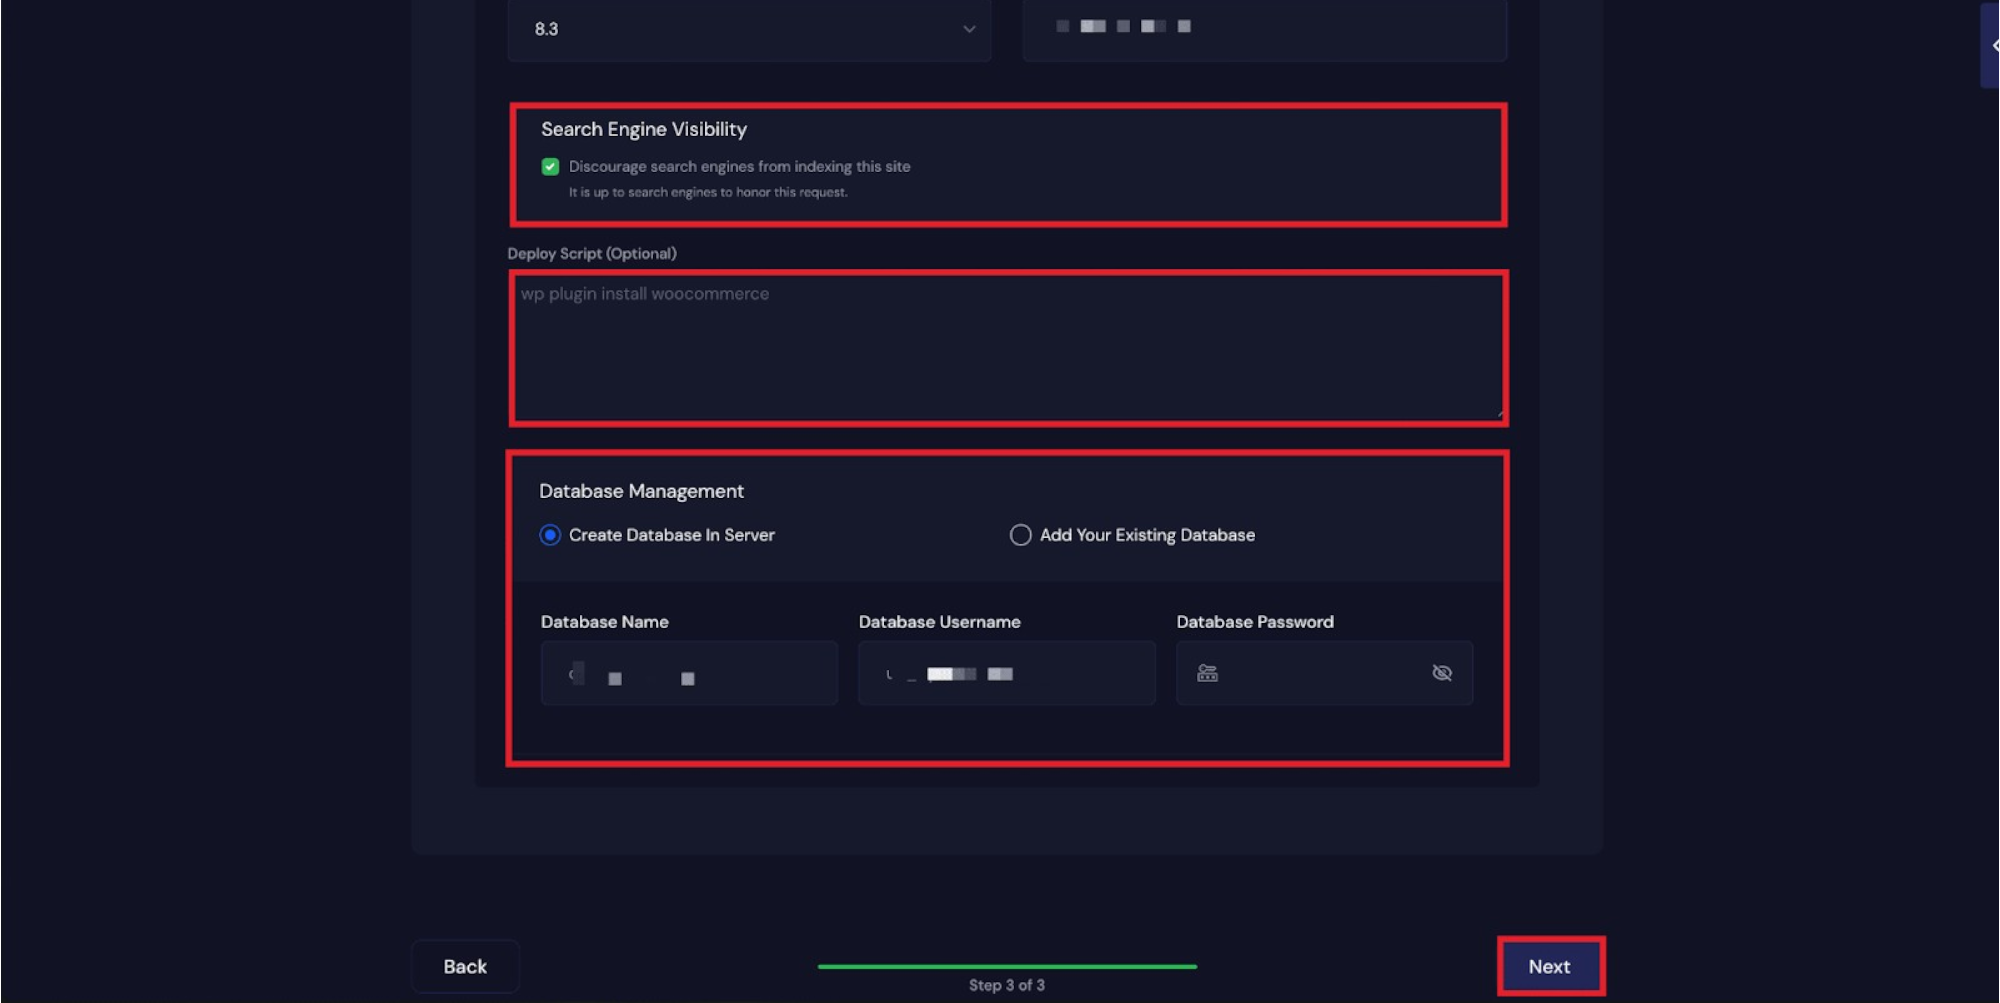
Under More Advanced Settings, you can manually update your ‘Admin Username’, ‘Admin Password’, and ‘Admin Email Address’. You can also configure Search Engine Visibility, Deploy Scripts, and Database Management settings to suit your needs.
Step 8: Review Your WordPress Settings
After completing the previous steps, click the ‘Next’ button. It usually takes just 1–2 minutes for xCloud to provision and create your site.
Note: After your site is created, Templately will automatically send an email containing your WordPress admin login credentials.
Step 9: Insert Full Site with AI Content
Now, click on the ‘Build with Templately AI’ button. This will automatically redirect you to the Templately dashboard.
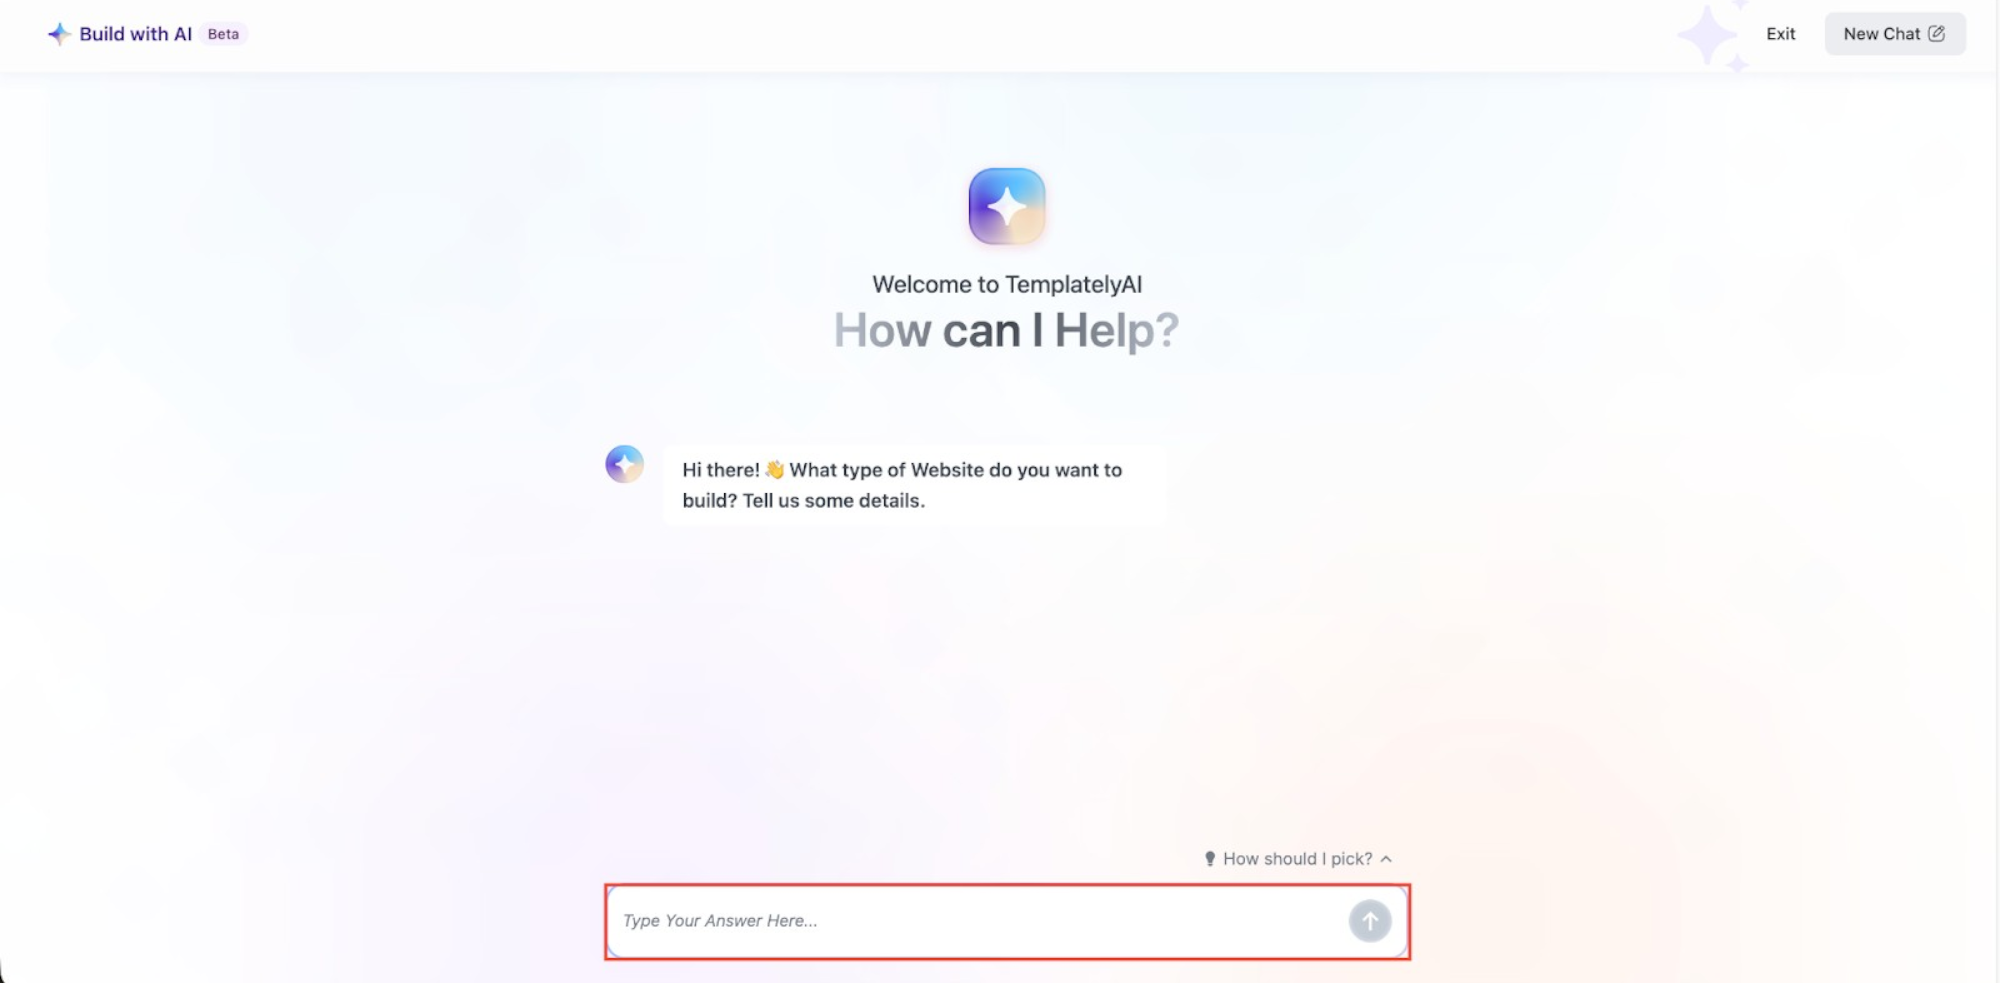
This is where the magic of aipowered automation tools happens. Guided by intelligent AI automation workflow tools, the AI will ask you a series of prompts to generate tailored content based on your answers:
- Business Name: Type your business name. (If creating a portfolio, you can use your own name).
- Industry: Define which industry your business belongs to. You can pick from suggested options or type your own.
- Business Details: Provide a detailed description of what your business does (e.g., “A digital marketing agency specializing in SEO”).
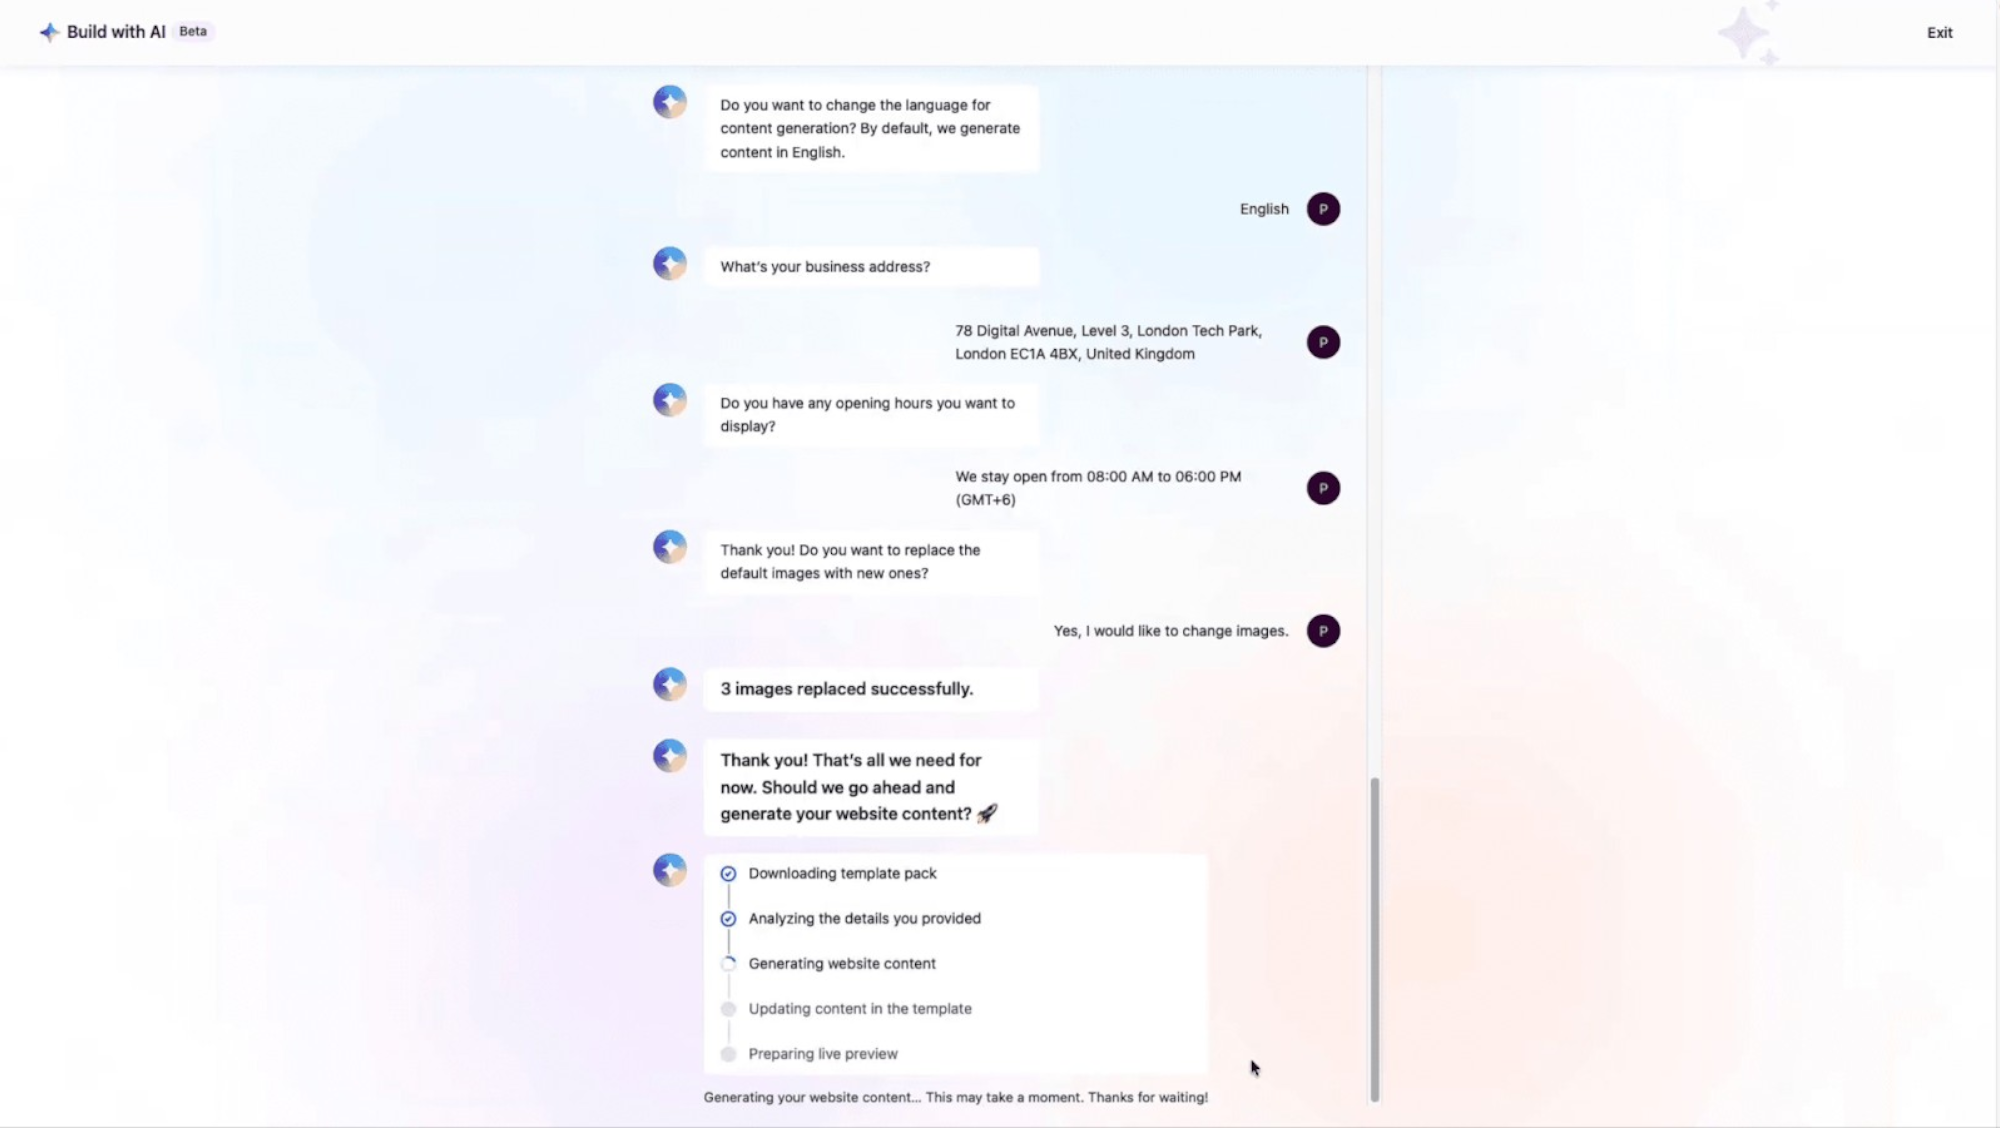
- Email Address: Add the public email address you want displayed in your website’s contact section.
- Contact Number: Add your public phone number, or click ‘Skip’.
- Business Address: Add your physical location, or click ‘Skip’.
- Opening Hours: Detail your business hours, or click ‘Skip’.
Customizing Images with AI
If you want to replace the default template images with customized visuals, Templately makes it easy. Click ‘Save Changes’ to agree to replace images. You can then select specific images to swap out, choosing from high-quality stock photos or uploading your own files.
Finally, click ‘Save Changes’. After importing the full site structure, click ‘Generate and Proceed’ to let the AI write your content and place your selected images.
Step 10: Final Styling & Launch
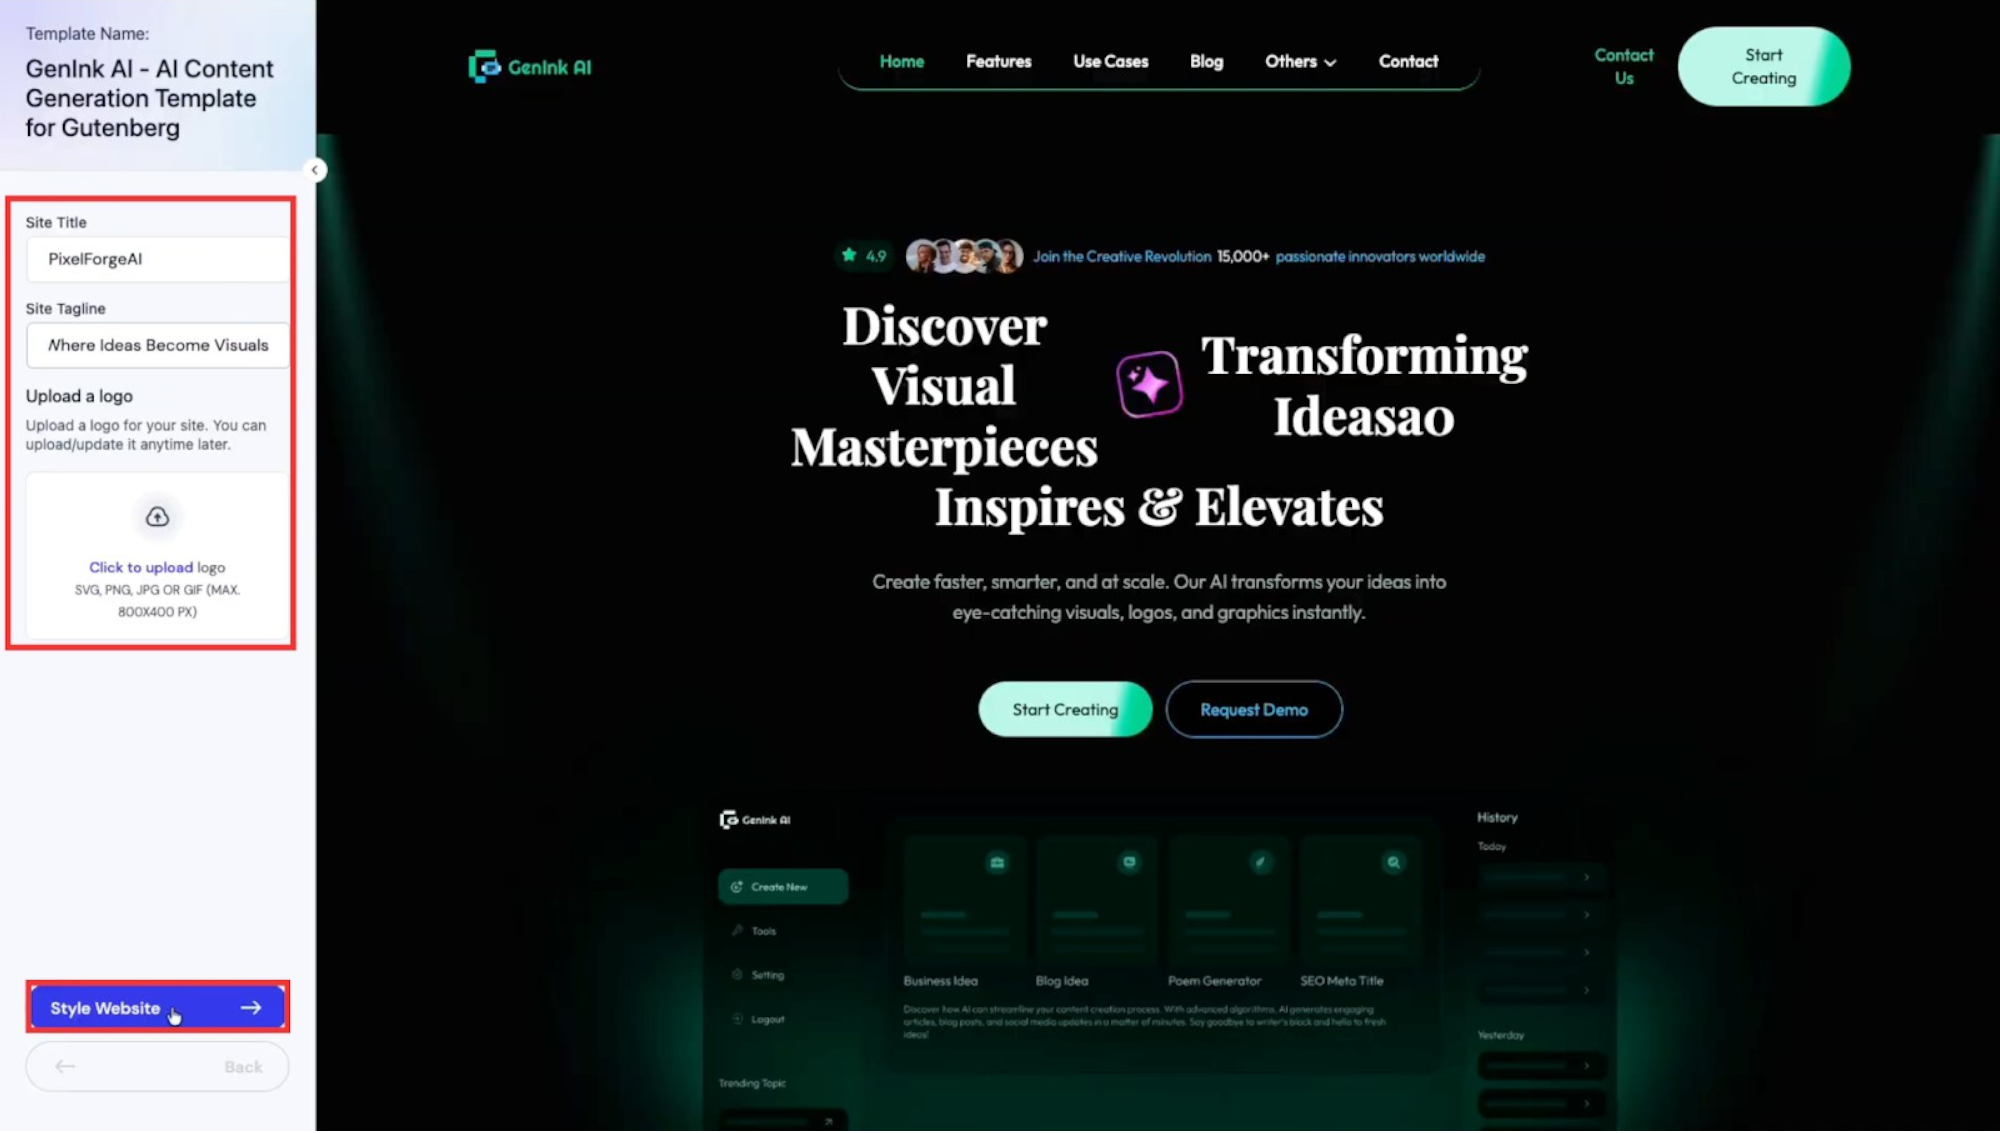
Once the AI finishes generating your content, you will see your website created instantly. Enter your ‘Site Title’, ‘Site Description’, and upload your ‘Logo’. Then, click on ‘Style Website’.
Adjust the color palette and ‘Typography’ to match your brand, then click the ‘Confirm Setup’ button.
Your Site is Ready!
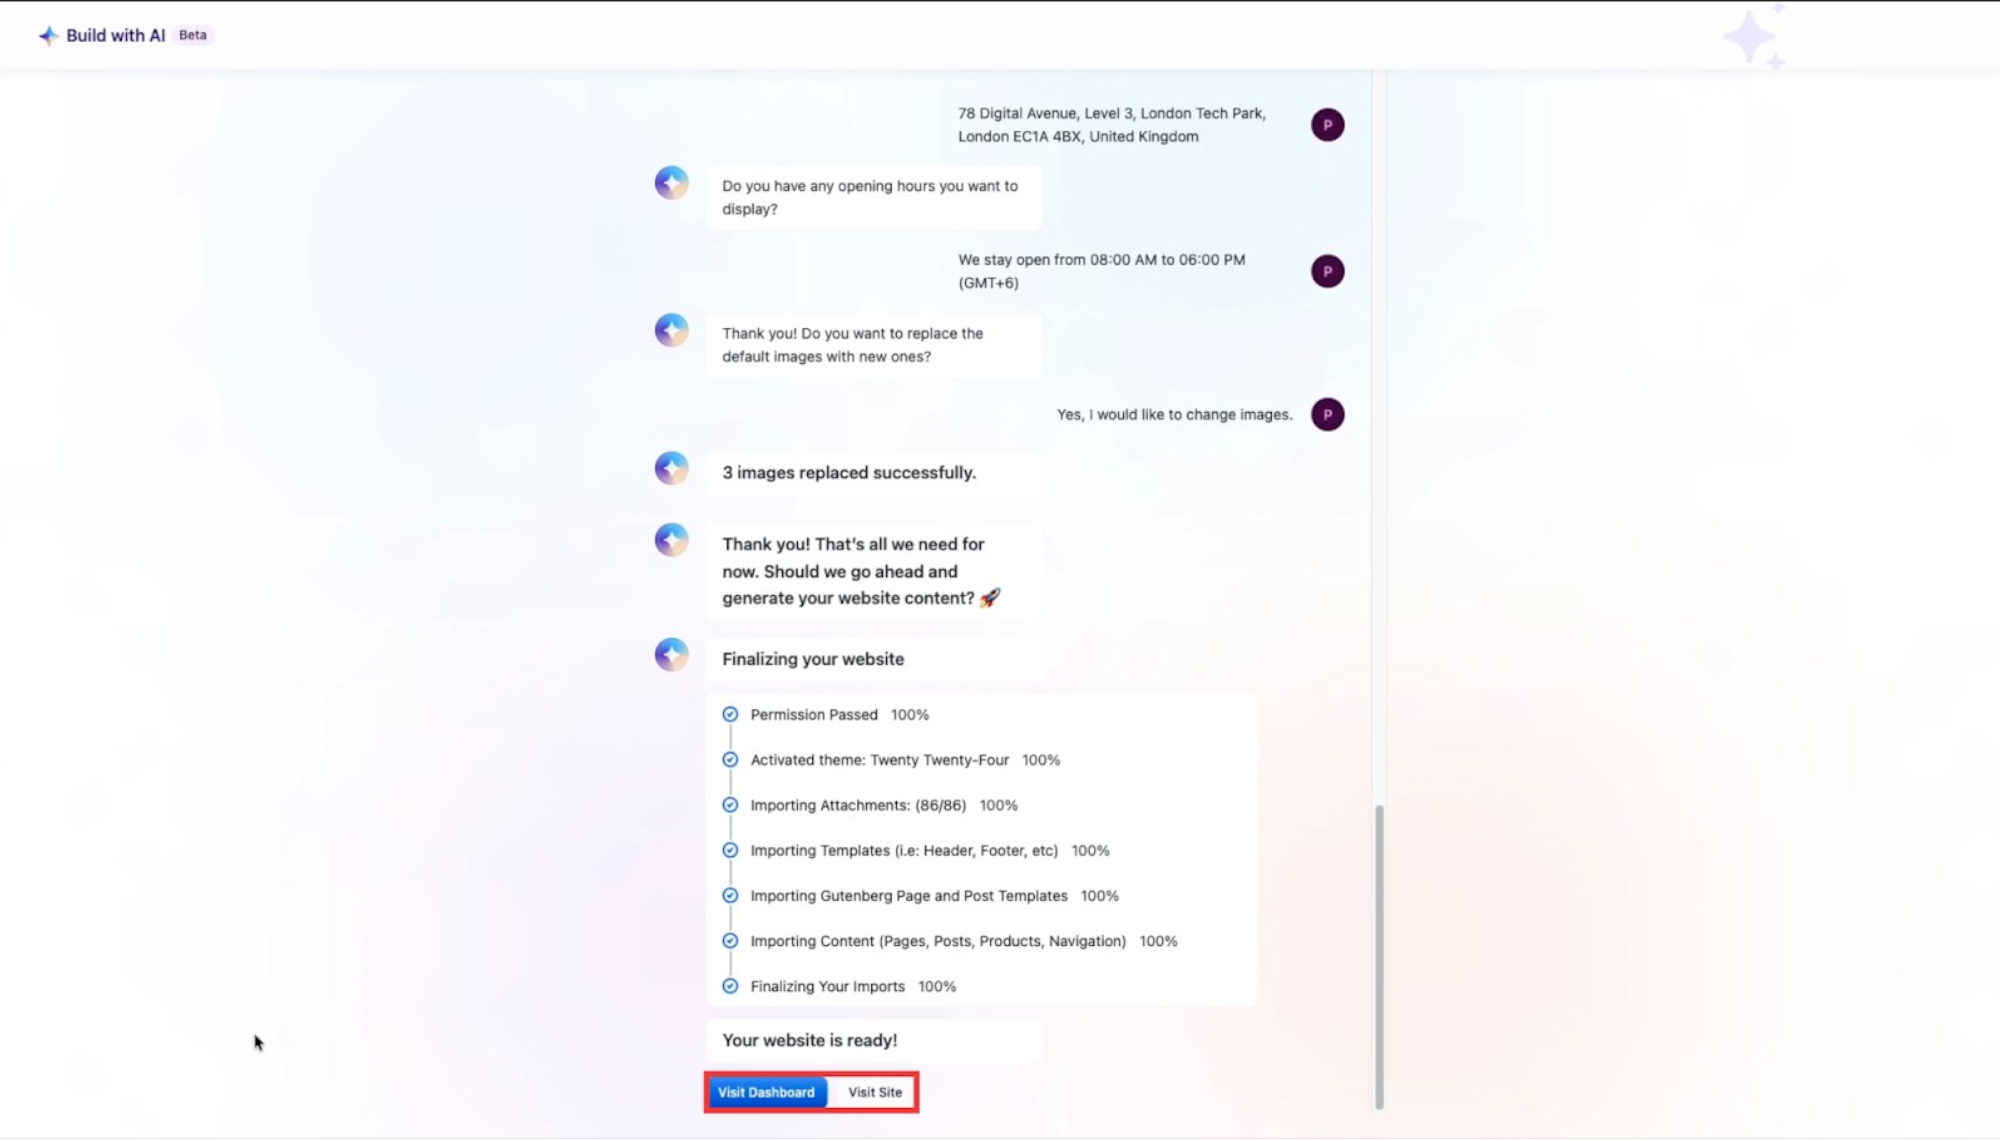
Your site creation is now complete! You will see two options: ‘View Dashboard’ or ‘Visit Site’. Click ‘Visit Site’ to admire your newly created, AI-generated WordPress website.
And that’s it! This is how effortlessly you can build and customize a fully functional WordPress website using the robust infrastructure of xCloud. By utilizing open source AI automation tools alongside Templately, building a professional web presence has never been faster or more intuitive.
xCloud Pricing Overview
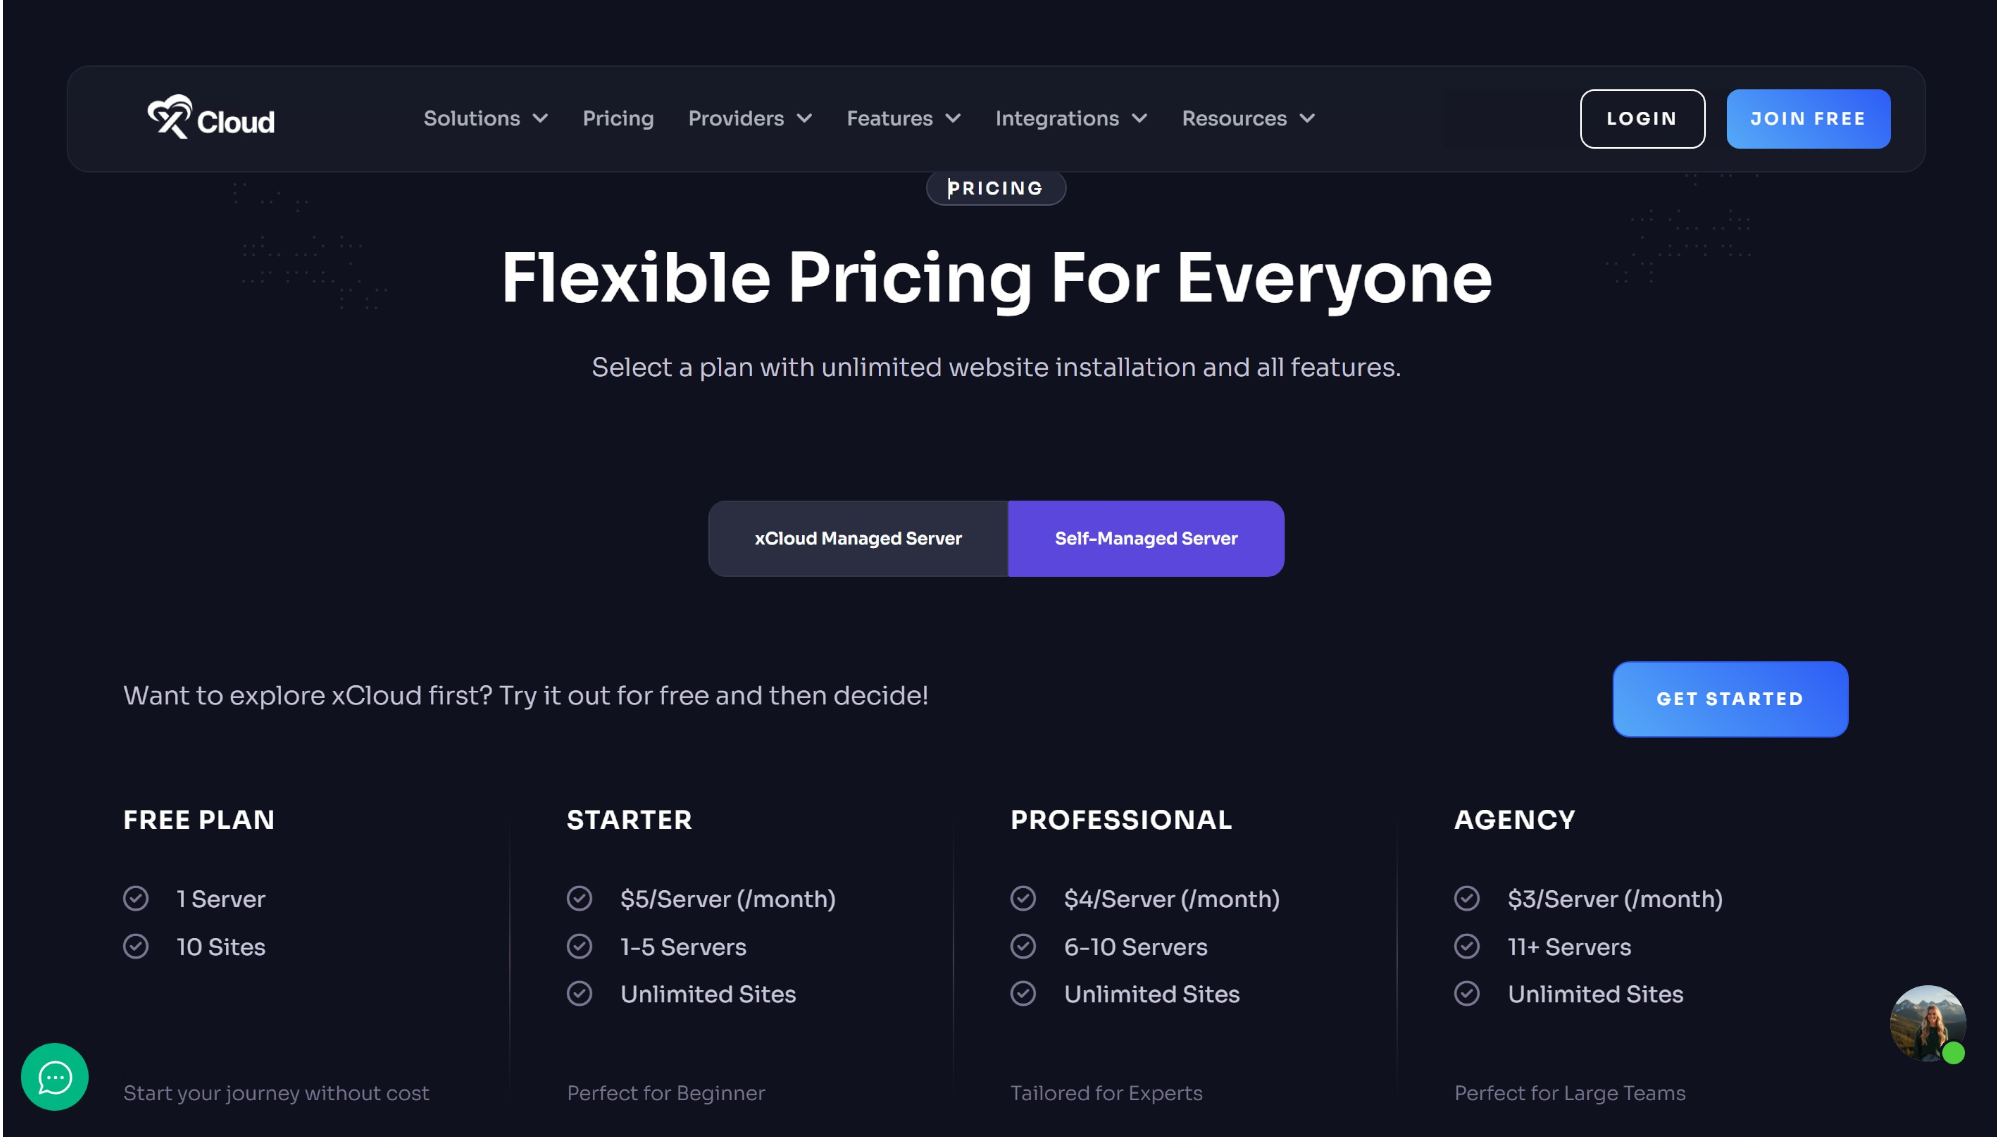
Before moving on to the FAQs, it is helpful to understand xCloud’s pricing structure. For self-managed servers, xCloud offers flexible, volume-based pricing. All paid tiers include full access to all features and allow for unlimited website installations per server.
- Free Plan: Start at no cost. This tier supports 1 Server and up to 10 Sites, making it ideal for testing the platform.
- Starter Plan ($5/Server/month): Supports 1 to 5 servers.
- Professional Plan ($4/Server/month): Supports 6 to 10 servers.
- Agency Plan ($3/Server/month): Supports 11 or more servers.
You can easily explore the platform using the Free Plan and upgrade to a paid tier later as your website or aipowered automation tools require more server resources.
To stay updated on the latest web development trends and AI workflow strategies, be sure to check out the expert insights on the Peraiz Blog.
FAQs
- What happens to Templately Pro access and my website after the 1-month free period ends?
After the complimentary one-month access ends, you will lose access to Pro templates and advanced features, and you won’t be able to connect more than three websites. However, your existing website will remain live and fully functional! All content and designs you created will stay exactly as they are. You can continue using free features or upgrade to PRO at any time.
- What if I already have a Templately Pro (or Lifetime Deal) account?
If you already have a Templately Pro or LTD account, xCloud will automatically connect to it—no new account is needed. Any website built through xCloud will not count toward your active site limit under your current subscription. Furthermore, the 100 AI credits provided by xCloud will be added directly to your existing balance (e.g., if you have 50 credits, you will now have 150).
- How do AI credits work? Are they separate from my existing Templately account?
The 100 AI credits included with xCloud are added directly to your current Templately account, regardless of your plan tier. They are not part of a separate dashboard. Once your credits are used up, you won’t be able to generate new AI content, but all previously generated content will remain safely on your website without interruption.


